WishList Member includes an integration with PayKickstart. You can set users to be added to a membership level in WishList Member if they purchase through PayKickstart.
More details are explained below (including a Video Tutorial).
—
Enable PayKickstart Integration
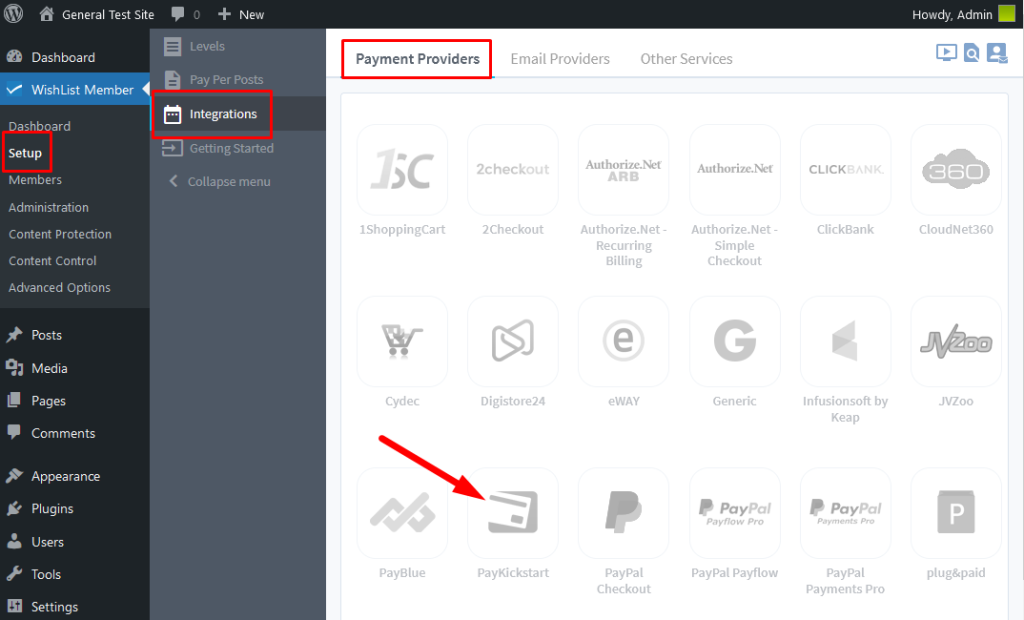
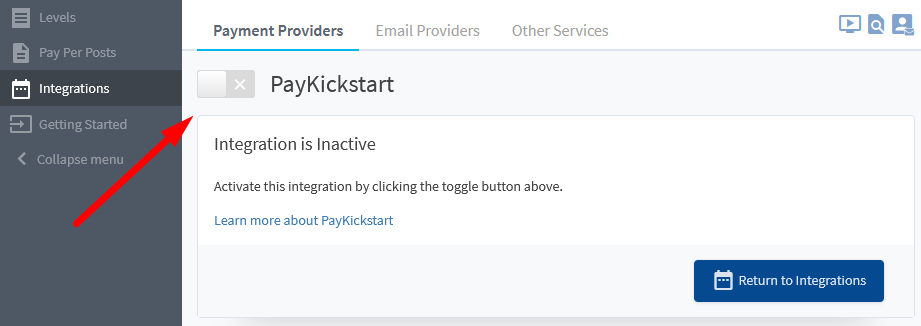
First, you can select and enable the PayKickstart option in the Setup > Integrations > Payment Providers section of WishList Member.
—
—
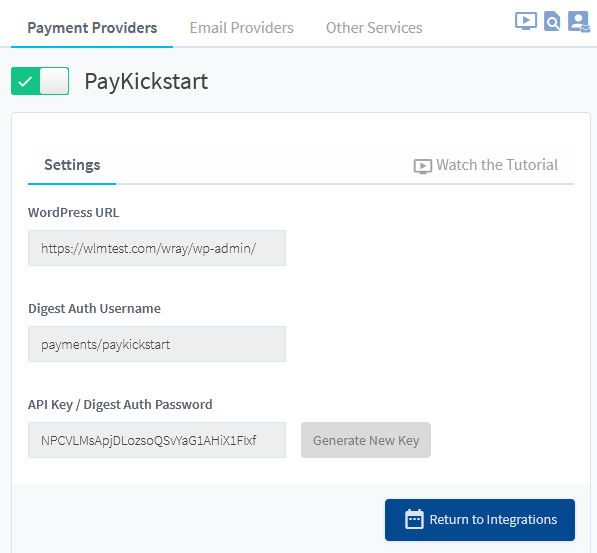
The Settings tab will appear with three fields and the blue Configure button will be displayed.
The WordPress URL and the API Key are two pieces of information needed to connect WishList Member and PayKickstart.
—
Connecting WishList Member and PayKickstart
The WordPress URL and the API Key from WishList Member can be copied from WishList Member and pasted into the corresponding fields in the Membership Integration > Membership Service section when creating or editing a Campaign on the PayKickstart site.
In the Campaigns section of the PayKickstart site, click the blue icon to edit a campaign.

—
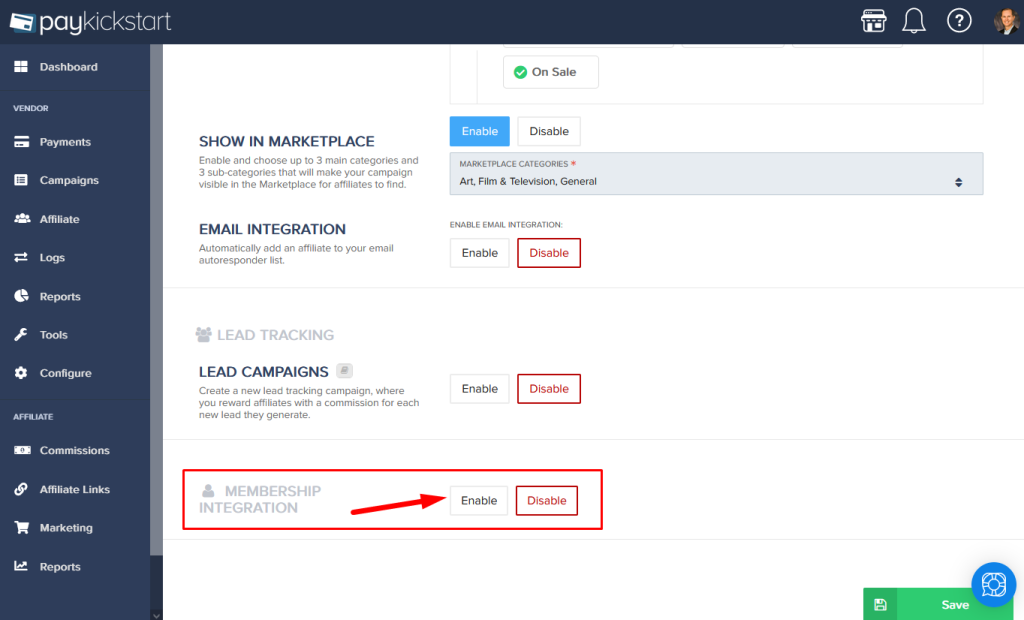
The Edit Campaign page will appear. Scroll to the bottom of the Edit Campaign page and enable the Membership Integration option.
—
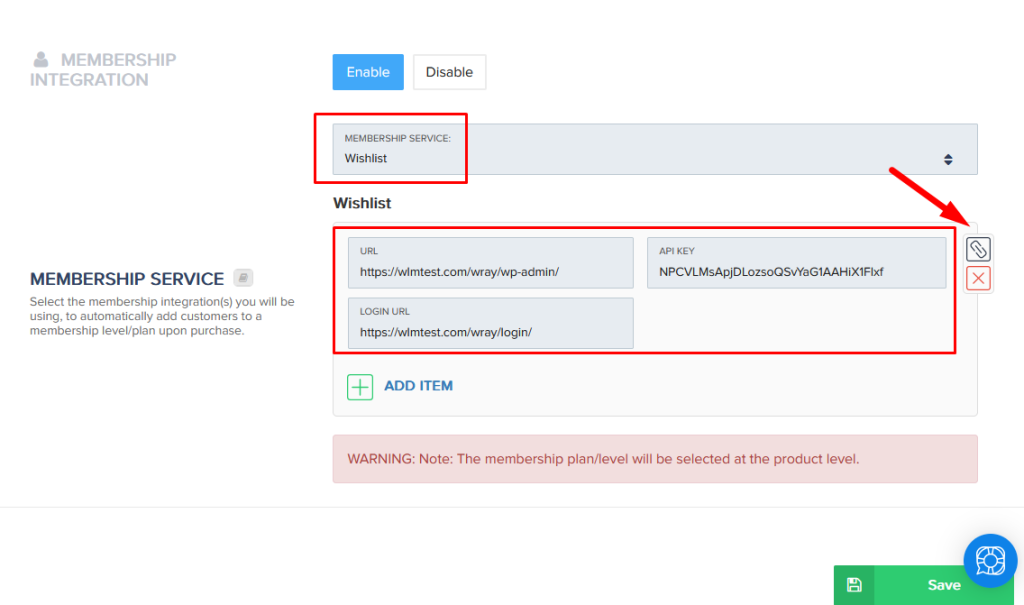
The Membership Services section will appear. Select Wishlist from the dropdown and enter the WordPress URL into the URL field and the API Key into the API Key field. You can enter your site login URL to the Login URL field.
Click the Connection Test button to the far right of the fields. This will test the connection and if the correct information has been pasted into the fields, a success message will be displayed.
Note: A message will appear stating the membership level will be selected at the product level. That is the next step.
Click the green Save button.
—
WishList Member and PayKickstart are now connected and the integration process can continue.
Integrating PayKickstart Products with WishList Member
You can create a product within a campaign in PayKickstart. You can then integrate that product with WishList Member so anyone who purchases the product will be added to the corresponding membership level in WishList Member.
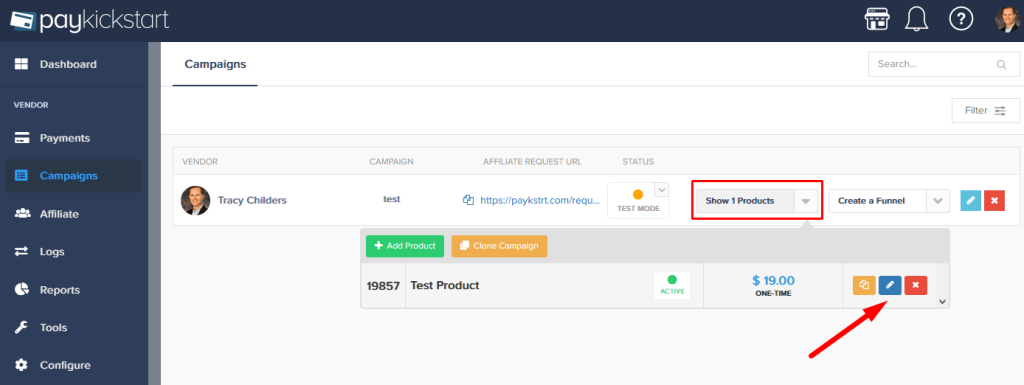
Select the product within the campaign in the Campaigns section of PayKickstart.
To do this, click the icon to edit a product. In this example, the product is named “Test Product” and we are going to integrate it with a membership level named Gold in WishList Member.
—
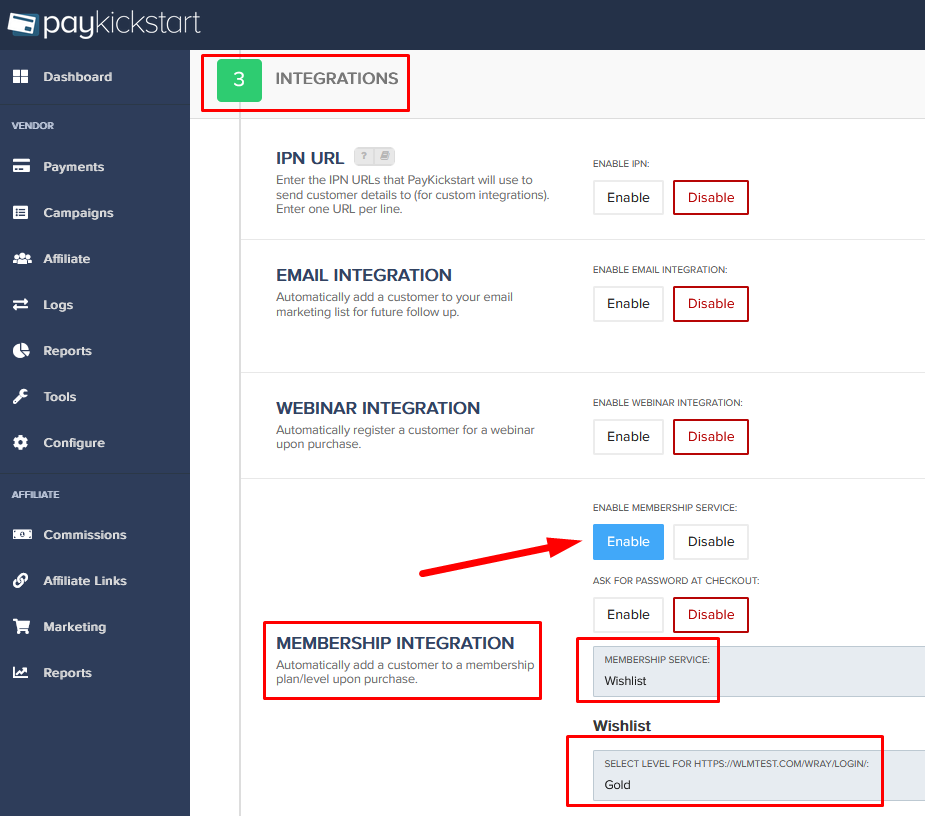
The Edit Product page will appear. There are 3 Steps displayed. Scroll down and select Step 3 – Integrations.
Click to enable the Membership Service option and select Wishlist from the dropdown.
Select the level to connect with this product.
—
Next, scroll to the top of the Edit Product page and click the green Save button.

—
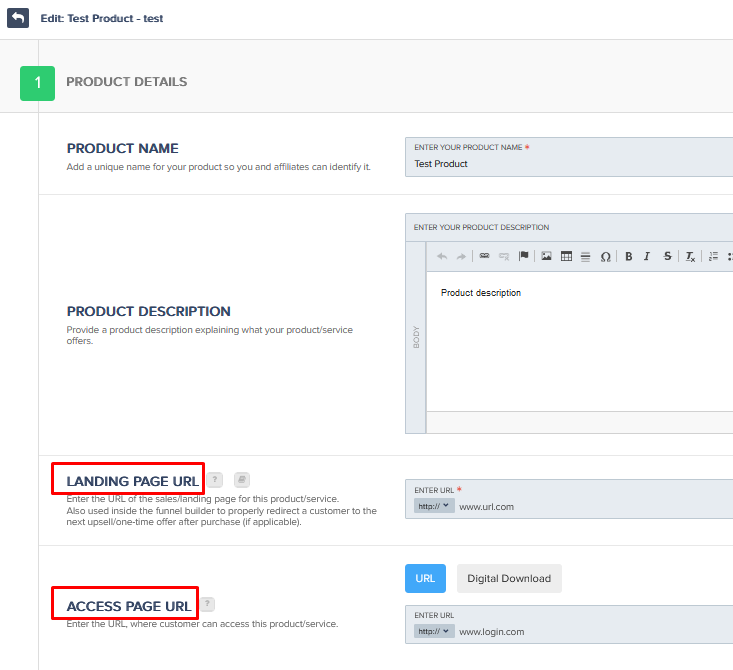
Next, two pages can be set in Step 1 – Product Details. Step 1 is on the top of the Edit Product page.
The two pages are Landing Page and Access Page for the product.
—
Landing Page URL. The landing page is where a user can go to purchase the product.
Access Page URL. The access page is where a user is able to access the product they purchased. This is typically set to a site login page or a dashboard page in a case like this.
—
The above method can be used to allow users to purchase access to a membership level.
This will result in the user being added to the set level when they purchase the product.
—
