
WishList Member and Thrive Automator. The integration between these two systems provides you with a number of options. This allows you to create automatic actions between WishList Member and many other systems. One of the best parts is no custom code is required. You can set up automations in minutes with just a few clicks.
This is done through the use of triggers that will cause specific actions to be carried out.
There are many different options so you can let your creativity loose. You could configure an action to move a member to another level if they expire from their initial level. An action could add a member to a level if they leave a comment on the site. A trigger of a specific time and date could be set to to add a new member to a selection of membership levels.
Webhooks can be set as triggers which really opens up the playing field. You can even create triggers and actions based on Thrive Apprentice and Thrive Architect. These are just a few examples. More details are explained below.
—
Installing Thrive Automator
The first step towards using WishList Member and Thrive Automator is installing the Thrive Automator plugin. This can be done in the Plugins > Add New > Upload Plugin section of WordPress.
Note: You will need to have downloaded the Thrive Product Manager plugin to your computer first. If you own Thrive Apprentice, it will be available to you within the Thrive Product Manager plugin.
More details on the installation process are available in the How to Use the Thrive Product Manager article on the Thrive Themes site.
Once you have downloaded the Thrive Product Manager plugin, you can upload and activate it on your site.

—

—
Then select Thrive Automator in the Product Manager section and click the “Install selected products” button.

—
Once you have completed the installation and activation process, Thrive Automator will appear in your menu in the Thrive Dashboard section.

—
Note: The Thrive Automator plugin is required to be installed and activated to use this integration. The integration will be enabled when you install and activate Thrive Automator.
Create Automations in Thrive Automator
There are many options when creating an automation. Selecting a type of trigger will result in different action options being available. This means certain triggers have certain actions.
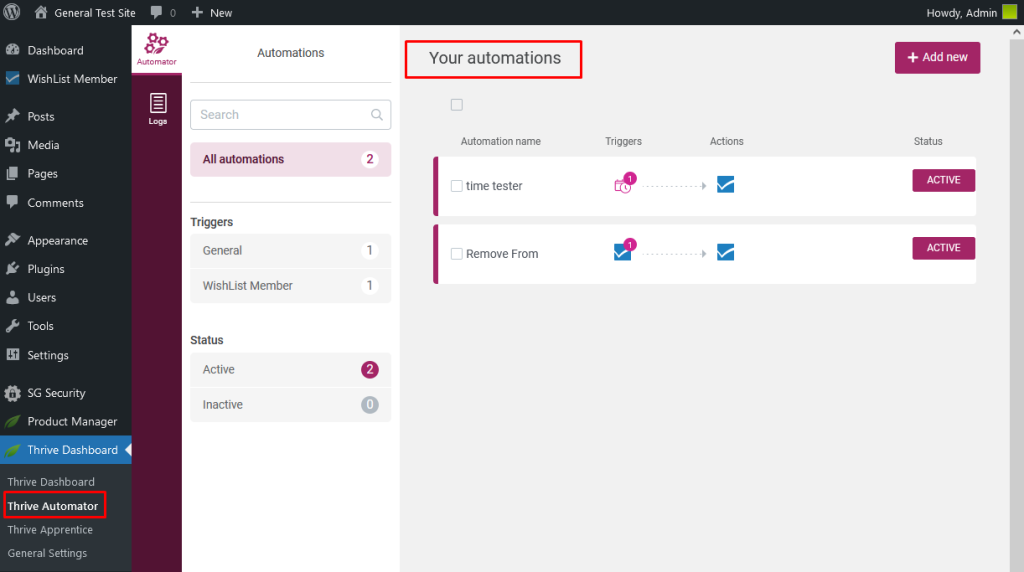
You can create automations in the Thrive Automator > Automations section.
The option to create your first automation is available or you can use the “Add new” button if you already have existing automations.
—
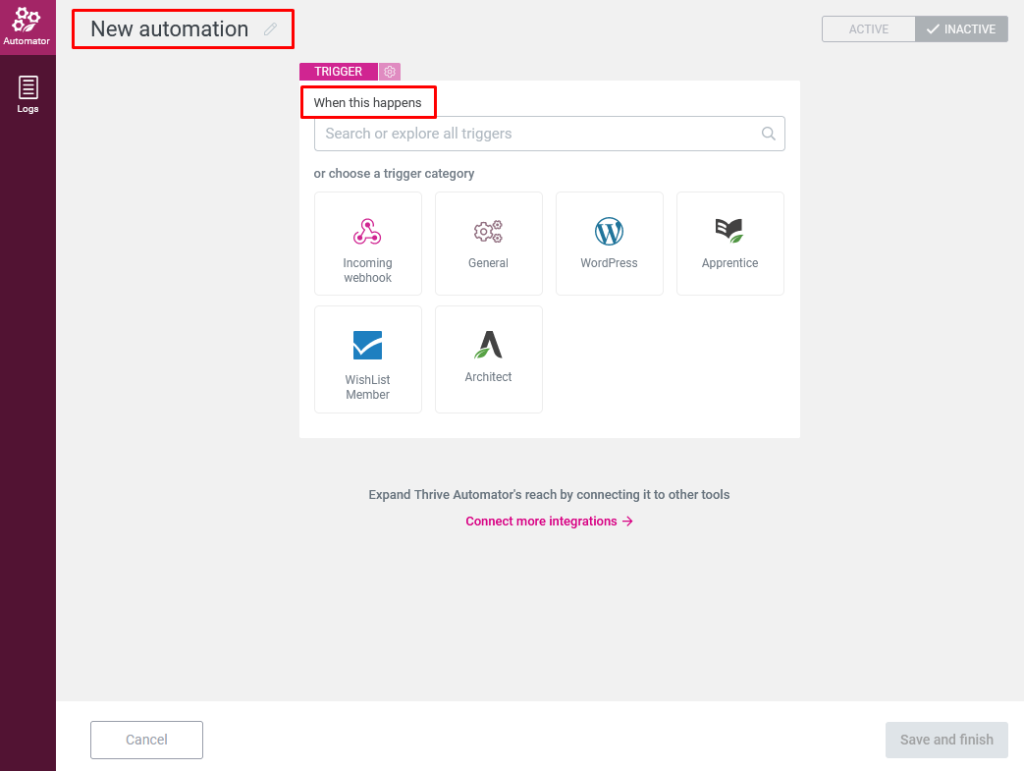
The “New automation” page will appear. You can name the automation and select the trigger.
Note: The trigger is what will start the process that leads to the action. “When this happens…”
—
There are many different trigger categories. These include WordPress, Incoming Webhooks, Thrive options like Apprentice and Architect, etc. WishList Member is also a trigger category.
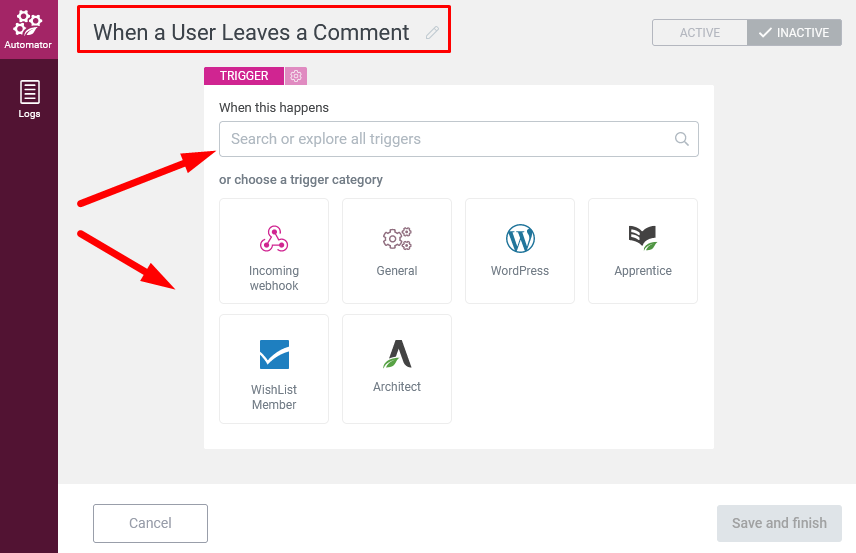
In this example, a new automation with the name When a User Leaves a Comment is being setup.
It will be set up to do the following:
- When a user leaves a comment on the WordPress site, they will automatically have the Gold membership level applied in WishList Member.
—
Set the name of the automation. The name is typically something related to the automation. In this case, it is named “When a User Leaves a Comment”.
Next, select the trigger. You can either select from the trigger categories or type in the available search field.
—
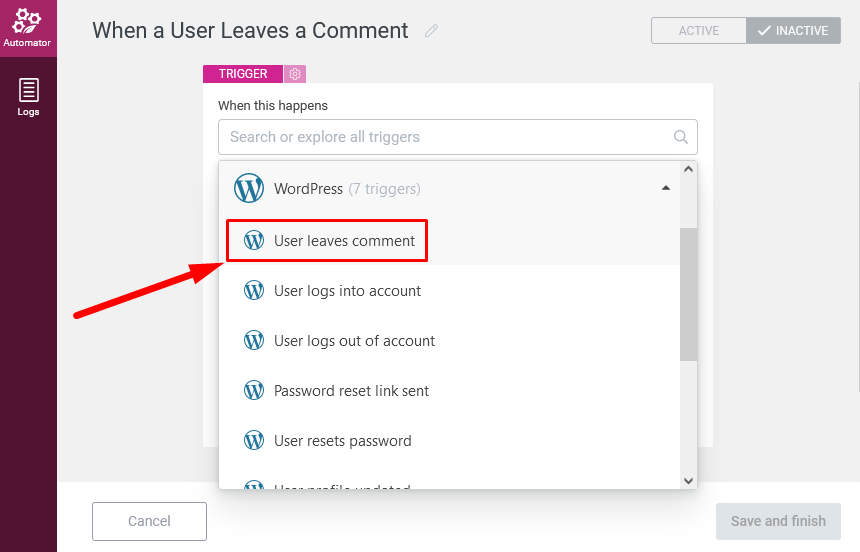
We have selected WordPress as the trigger category so the available WordPress triggers are displayed in the dropdown. The “User leaves comment” trigger is being selected in this example.
—
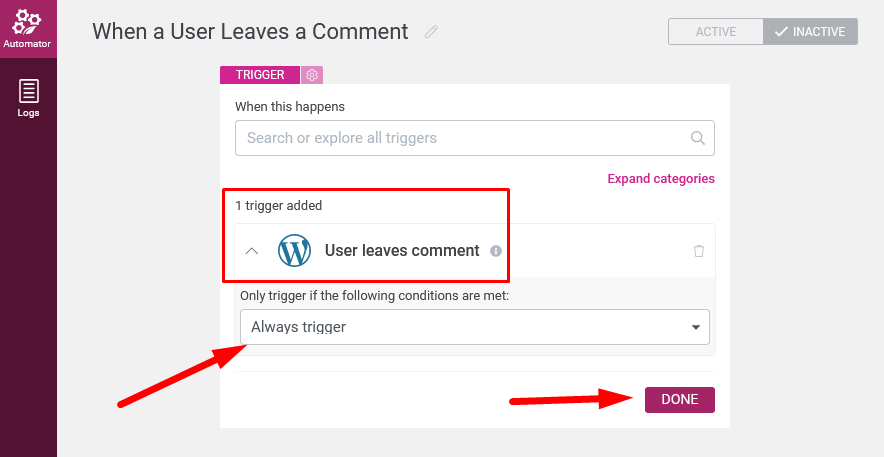
Select the trigger and the “Only trigger if the following conditions are met” dropdown appears. There are a variety of options within the dropdown including user ID, registration date, email address and more. This means the trigger can be set to happen during specific situations.
In this case, we are setting the option to “Always trigger”. This will result in the action being applied every time the trigger occurs.
Click the Done button when finished.
—
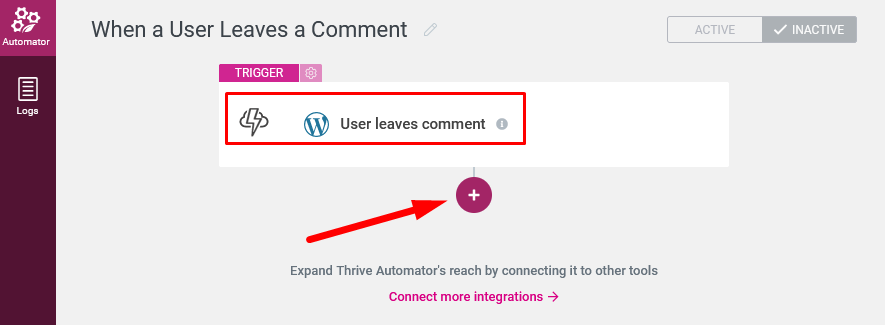
The trigger is now created. The next step is creating the action to go with the trigger.
Click the plus button to add an action.
—
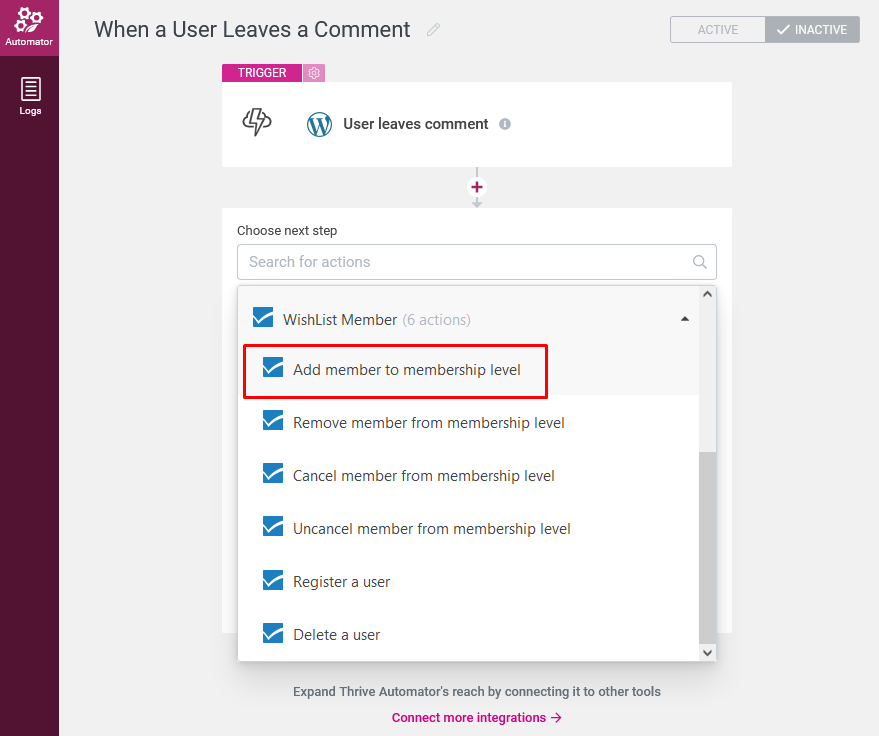
Next, select the action. You can either select from the action categories or type in the available search field.

—
We have selected WishList Member as the action category so the available WishList Member actions are displayed in the dropdown. The “Add member to membership level” action is being selected in this example.
—
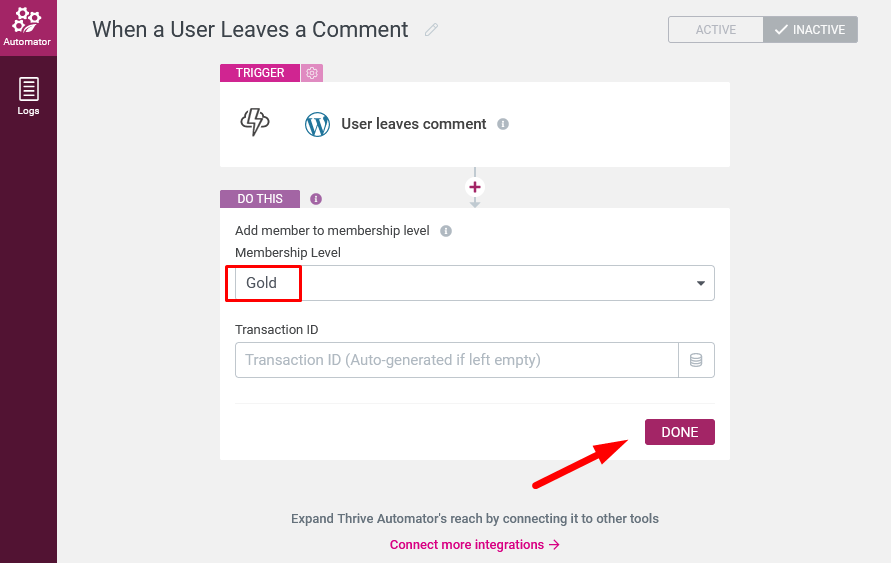
Select the action and a dropdown to select the membership level and a dropdown to set the optional transaction ID appears in this case.
We have selected the Gold membership level and left the transaction ID blank. (this means the transaction ID will be automatically generated).
Click the Done button when finished.
—
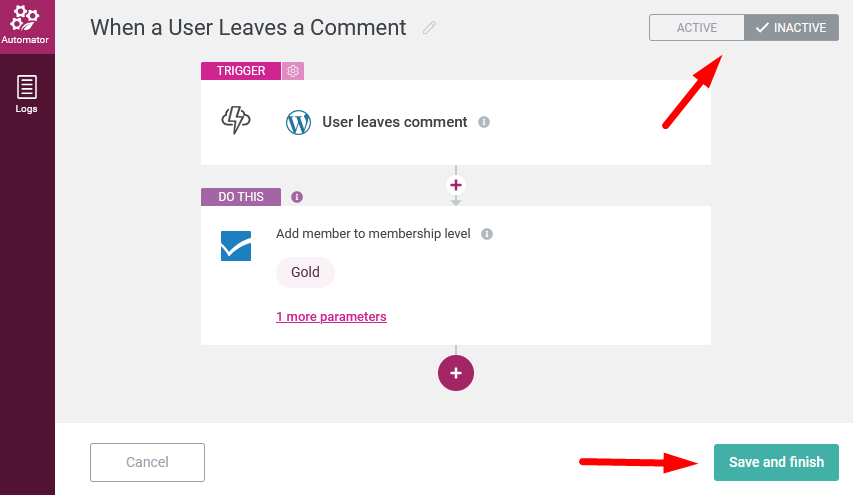
The trigger and action are now setup. The final steps are to set the automation to Active and click the Save and Finish button.
—
The new automation appears on the list of automations and will function moving forward.
This example shows any user who leaves a comment on the site will automatically be added to the Gold membership level in WishList Member.

—
Additional automations can be created at any time. There are many different options and combinations available to use for the various systems when using WishList Member and Thrive Automator.
—
More details on using WishList Member with Thrive Architect
More details on using WishList Member with Thrive Apprentice
