
The Badges add-on in CourseCure allows you to award Badges to users based on criteria you create. This means you could set a special Badge to be given to users when they post their first comment on your site. Another Badge could be issued when they reach the 10, 25, 50 (or more) comments mark. How about an exclusive Badge based on the amount of times a user logs into the site? You can create Badges that handle it all.
These types of Badges are easy to set up and they help to promote member interaction while also encouraging them to return and check our your site regularly. All of this is possible and its just scratching the surface when it comes to using the Badges add-on in CourseCure.
You can select from the library of professionally designed Badges or you can create your own unique set of Badges. You also have the option to incorporate additional CourseCure Add-ons with Badges like Quizzes, Points and Courses.
This Knowledge base entry includes details and examples of the available Badges features and functionality within CourseCure. The table of contents on the right can be used to jump to any section.
—
Badges Setup
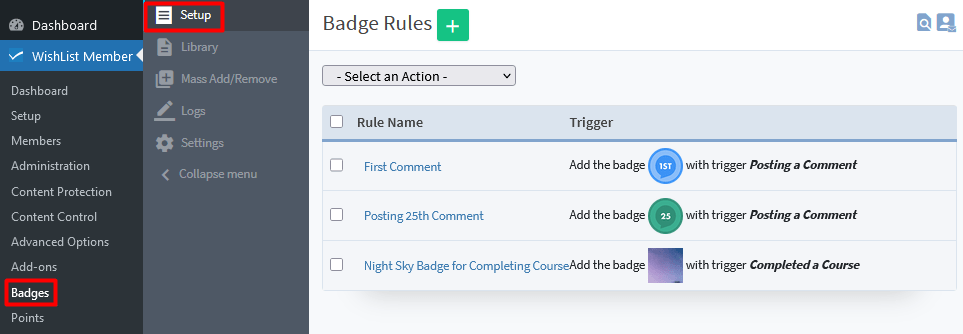
Badge Rules are used to setup automation for adding Badges to a user account or removing Badges from a user account. A Badge Rule can be created in the Badges > Setup section of WishList Member. You will see a list of any existing Badge Rules and can create new ones.
—
Each Badge Rule will either add a set Badge to a user account or remove a set Badge from a user account based on how the Trigger is configured.
A Trigger basically means “When this happens”… “Then do this”
The green plus icon on the top of the Badge Rules section can be clicked to begin the Badge creation process.

—
The first step is to set a Name for the Badge Rule and click the green Apply button.

—
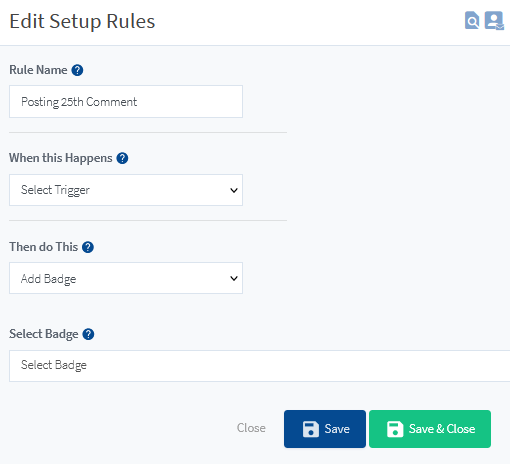
Once the Badge Rule has a Name, the Edit Setup Rules section will appear and the available settings can be configured for that specific Badge Rule.
—
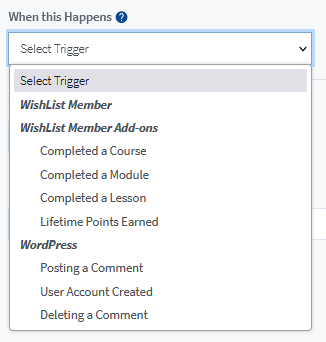
There are a variety of different Triggers in the “When this happens” dropdown. The list of Triggers is populated based on the standard WishList Member Triggers and the additional Triggers related to any other CourseCure Add-ons you might have installed on your site.
—
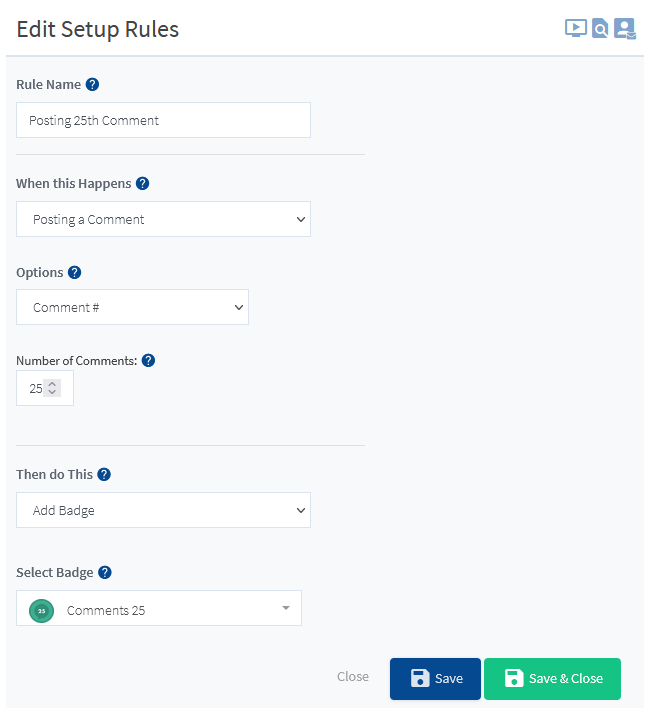
Selecting a specific Trigger from the dropdown will result in showing the specific options for that Trigger.
Triggers can range from user login and user comments to a user completing a Quiz or Course. There is a wide selection of Triggers for you to choose.
In the example shown below, users will be issued a Badge when they post their 25th comment on the site. There is a range of included Badges available for you to select or you can create your own Badges. (More information on creating Badges can be found in the Badges Library section below).
The blue Save or green Save & Close button can be clicked once all settings are configured.
—
Badges Library
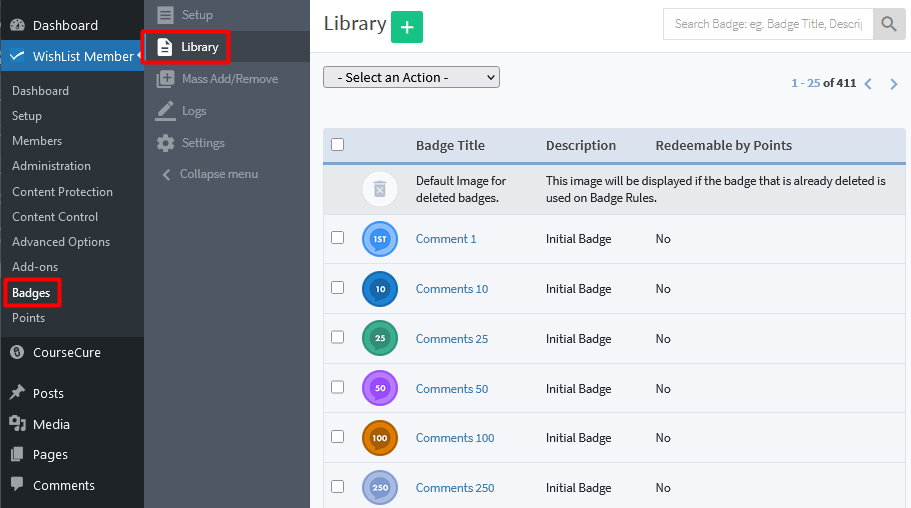
A large library of Badges is included in the Badges > Library section of WishList Member and they come in different colors and designs. These Badge are ready to use or you can create your own Badges.
—
A new Badge can be created by clicking the green plus button.

—
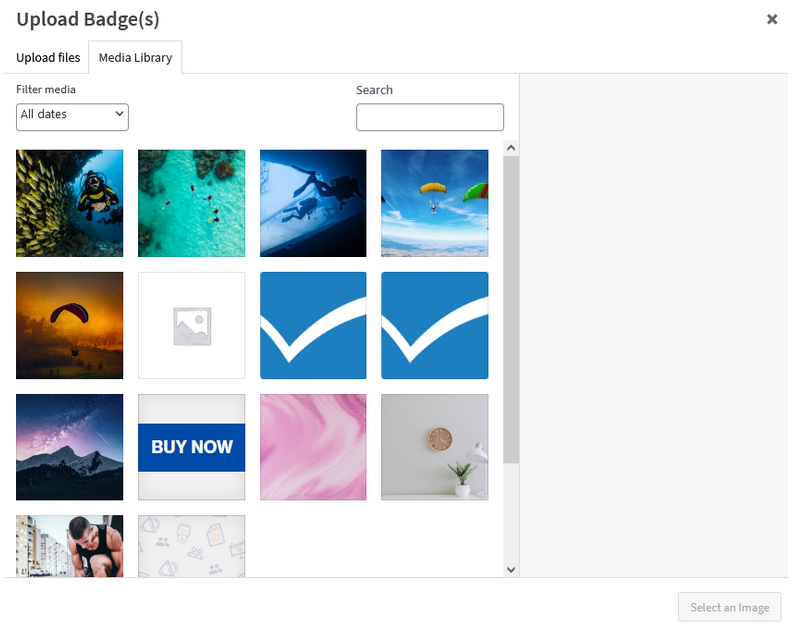
The Upload Badge(s) pop up will appear and the WordPress Media section will be displayed. Any existing image can be selected as a Badge or a new image can be uploaded using the typical WordPress Media method.
—
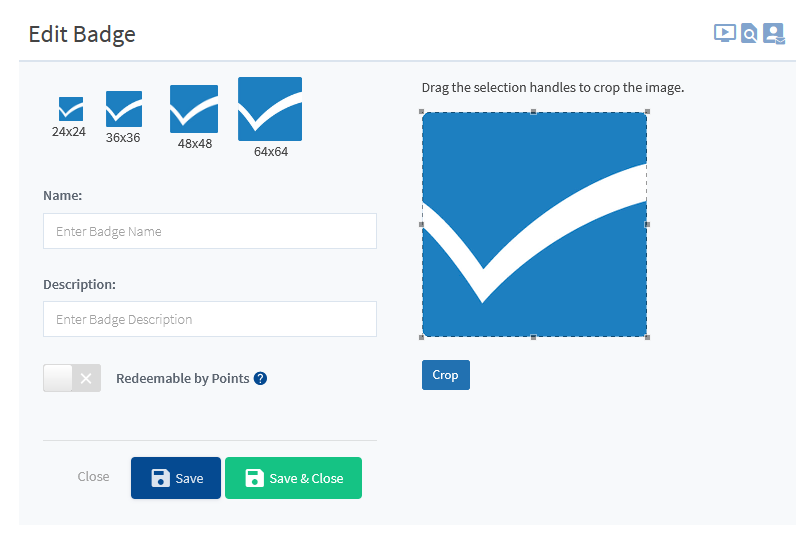
Upload or select the desired image and the Edit Badge section will appear.
—
The Drag tool can be used to crop the image and set the Badge how you want it to be displayed. The blue Crop button needs to be clicked once the dimensions are set.
Name. The name of the Badge. This name will appear on the list of Badges in WishList Member.
Description. The description of the Badge. This is an optional field and can be used to include a brief description of the Badge.
Redeemable by Points. If enabled, the Badge can be redeemed by a user with Points. The CourseCure Points Add-on would need to be installed and enabled on the site to use this option. This option would allow a user to redeem the set number of Points to be issued the Badge. Only users with enough Points would be able to redeem those Points for the Badge.
The blue Save or green Save & Close button can be clicked once all settings are configured.
—
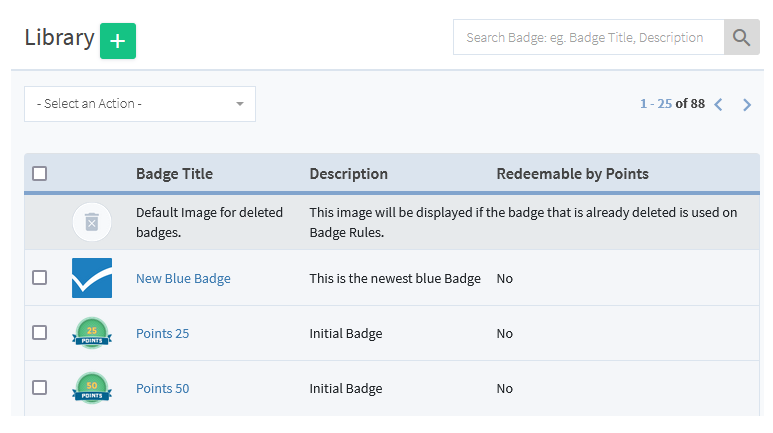
The newly created Badge will now appear on the list in the Library.
—
Badges Mass Add/Remove
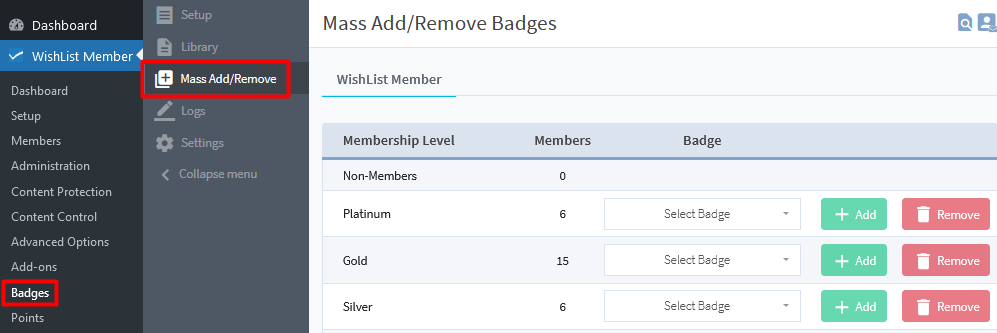
The option to add or remove a Badge for all members in a level can be done in the Badges > Mass Add/Remove section of WishList Member.
The desired Badge can be selected using the corresponding dropdown and the green Add or red Remove button can be used to Add/Remove the Badge for all members within that specific level.
—
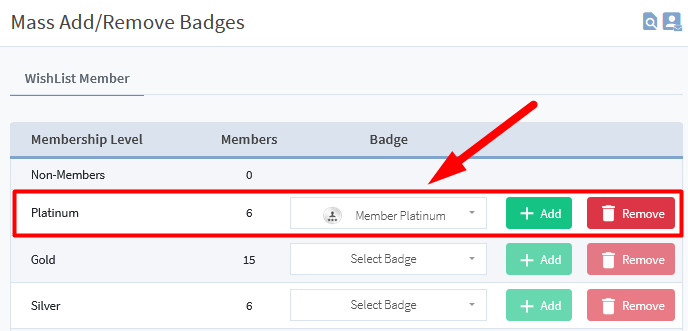
The screenshot example below shows the Badge named “Member Platinum” has been selected for the Platinum level and clicking the Add button will add that Badge to all members in the Platinum level.
—
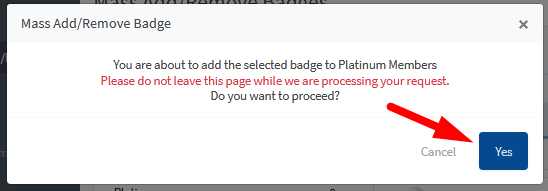
The Mass Add/Remove Badge popup will appear and you will be asked if you want to proceed with the selected action.
—
Once you confirm the action, a progress message will appear.

—
A final message stating the action is “Done” will be displayed and the Mass Add/Remove action for the selected level and Badge is complete.

—
Badges Logs
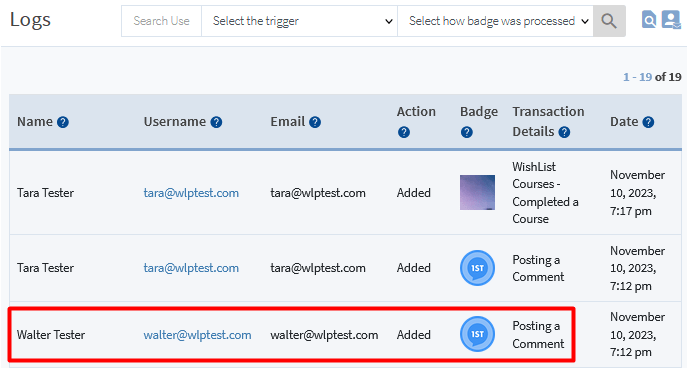
The Badges > Logs section in WishList Member displays a list of users and their Badges history. This includes a record of Badges that were added to their account or Badges that were removed from their account.

—
An advanced search is available with options to Select the Trigger type and/or Select How the Badge was Processed (Added or Removed).

—
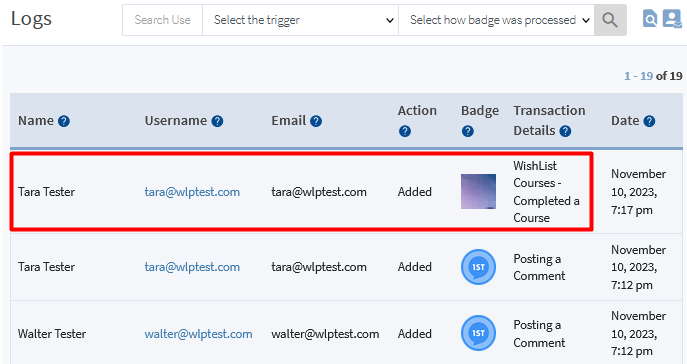
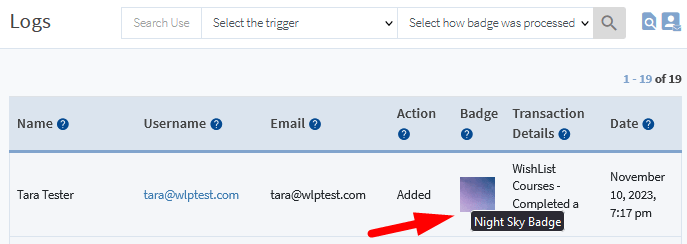
A brief description of how the Badge was added/removed is displayed in the Transaction Details column. The screenshot example below shows a member named Tara Tester with a Badge added to their account when they completed a course.
—
Another member named Walter Tester had a Badge added to their account when they posted a comment.
—
—
Badges Settings
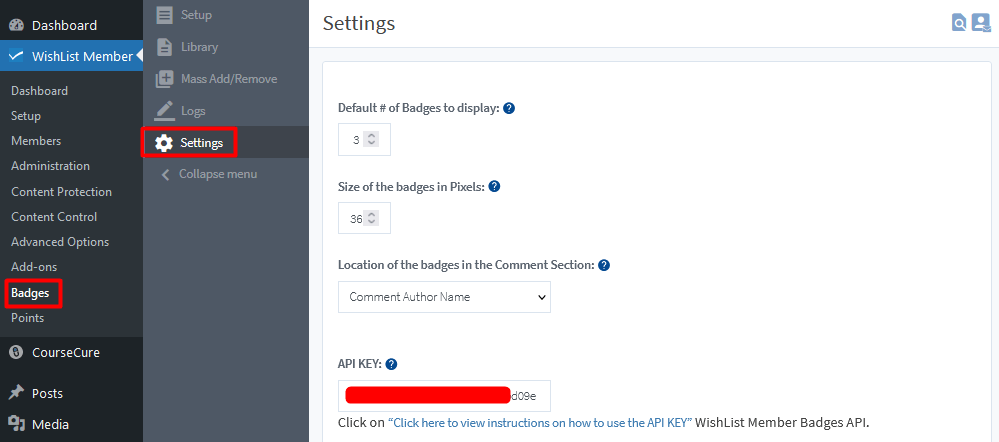
The Badges > Settings section in WishList Member includes general settings for Badges.
—
Display Badges on User Comments Profile. If enabled, Badges will be displayed on the User Comment Profile on the live site.
Default# of Badges to Display. Set the default number of Badges to display for a user on the live site. Note that if a user earns more than the default number of Badges a “More” option will appear which can be clicked to view the additional Badges.
Size of the Badges in Pixels. Set the size of the Badges (in pixels) that will be displayed on the User Comment Profile on the live site.
Location of the Badges in the Comment Section. Select the section the Badges will be displayed on the User Comment Profile on the live site.
—
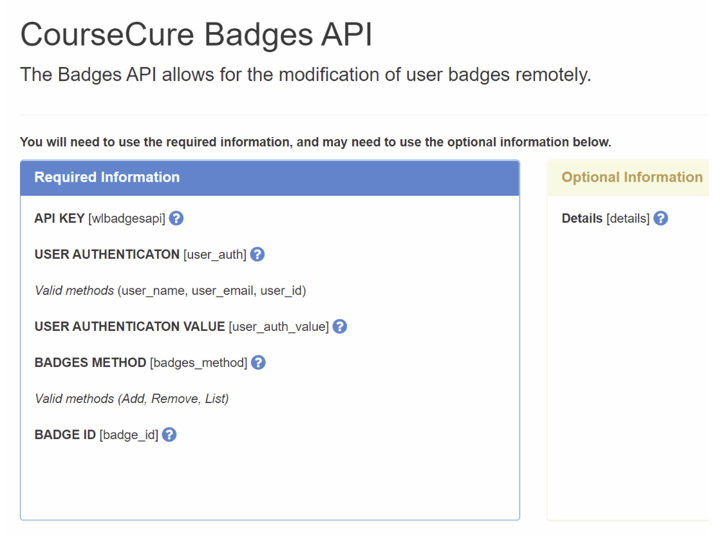
API Key. The “Click here to view instructions…” API KEY link directs to a page on your site with more details on using the CourseCure Badges API. An example screenshot of that page is included below.
—
You can use the Badges add-on in CourseCure to encourage member engagement and interaction. Use the included selection of Badges or create your own to customize the experience for your community. You have the power to add Badges or remove Badges based on the actions of your members. So, you only have to set a Badge Rule once and the Badges Add-on for CourseCure will handle the rest.
Additional CourseCure Add-ons like Quizzes, Points and Courses can also be used with Badges.
