WishList Member includes an integration with ClickBank. This allows you to automatically provide access to a member in WishList Member if they purchase through a ClickBank powered payment link/button.
All the details are explained below (including a Video Tutorial).
—
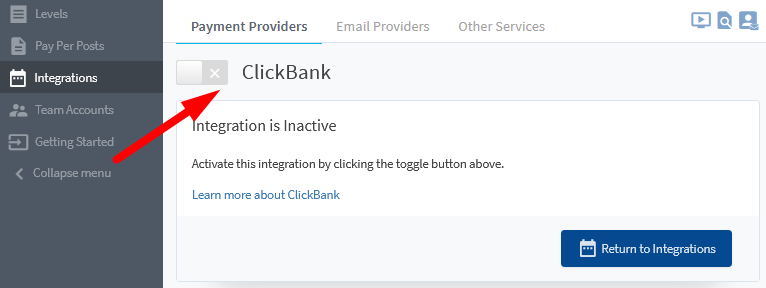
Enable ClickBank Integration
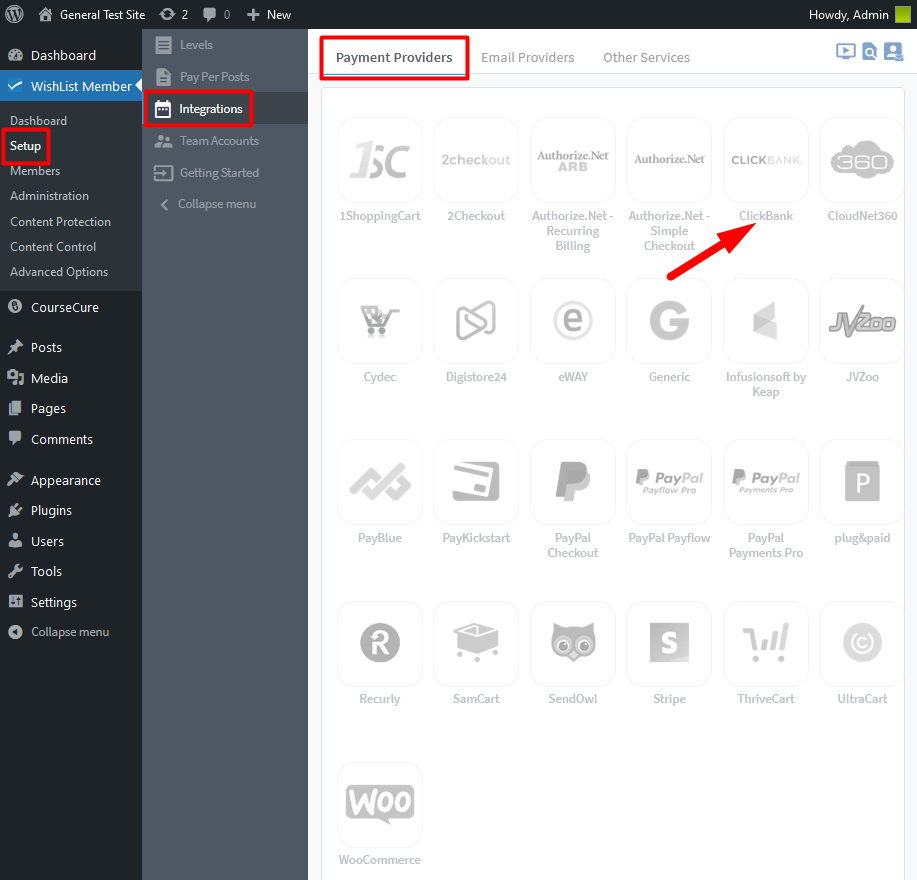
You can select and enable the ClickBank option in the Setup > Integrations > Payment Providers section of WishList Member.
—
—
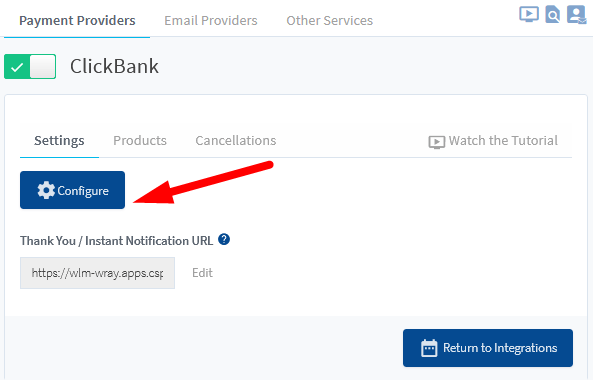
The Settings tab will appear and a blue Configure button is displayed. WishList Member and ClickBank need to be connected using a few specific pieces of information provided by WishList Member and ClickBank. This quick connection process is explained below.
Connecting WishList Member and ClickBank
Click the blue Configure button.
—
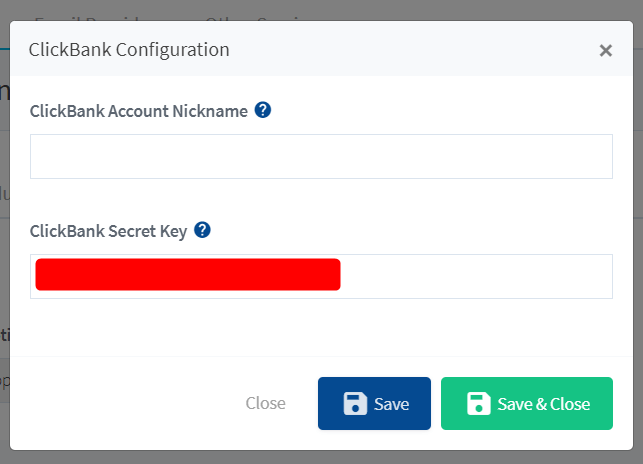
The ClickBank Configuration popup will appear and two fields are displayed.
—
The two fields are used to create the connection between WishList Member and ClickBank.
- ClickBank Account Nickname (will be copied from ClickBank and pasted into WishList Member)
- ClickBank Secret Key (will be copied from WishList Member and pasted into ClickBank)
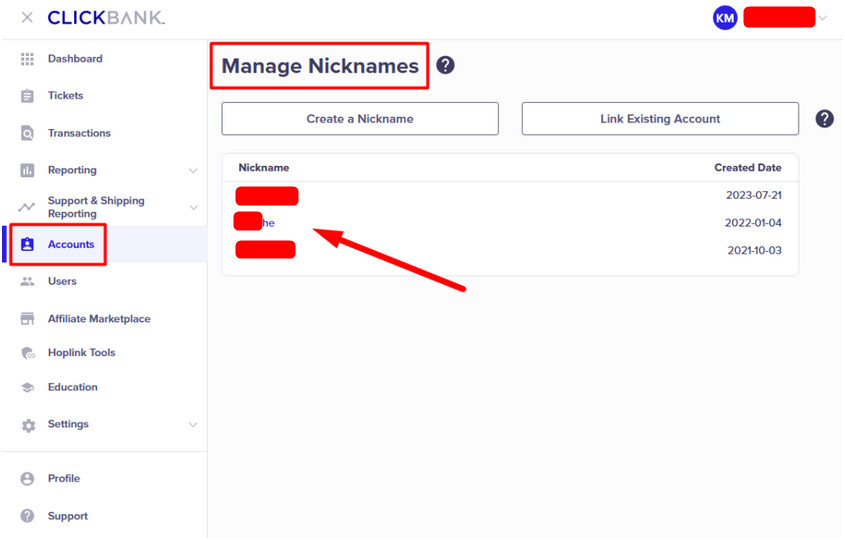
The ClickBank Account Nickname is located in the Accounts > Manage Nicknames section of ClickBank. You may have one or multiple accounts within ClickBank and each has its own Nickname.
—
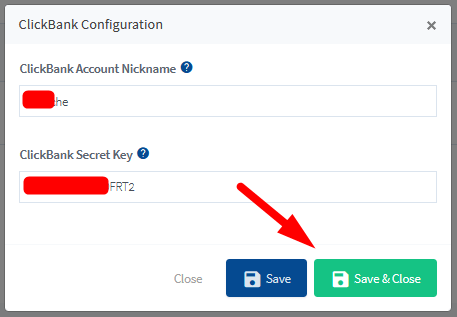
Paste the ClickBank Account Nickname from ClickBank into the corresponding field in WishList Member in the ClickBank Configuration popup. Click the Save & Close button to save these settings.
—
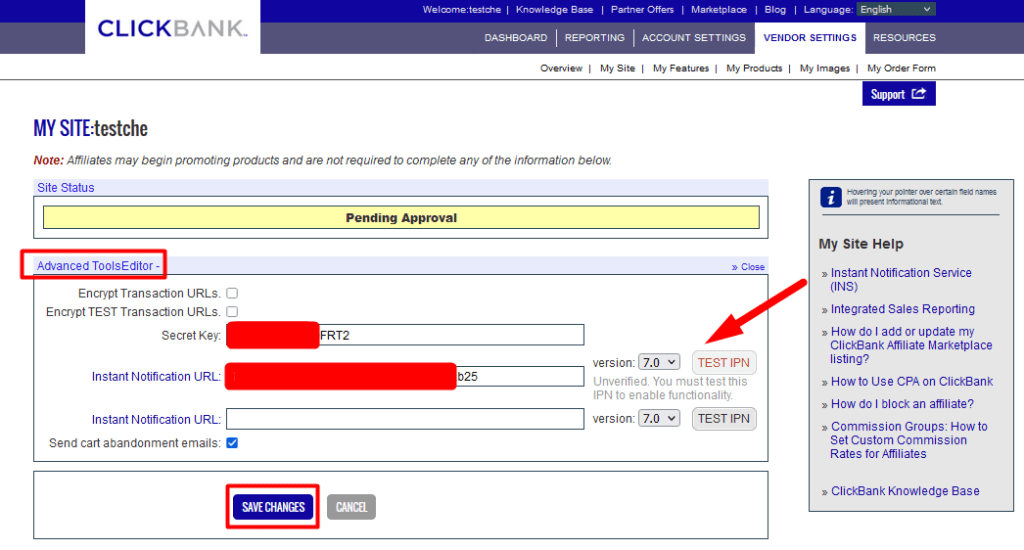
Next, you can copy the ClickBank Secret Key from WishList Member and paste it into ClickBank by clicking on the ClickBank Account Nickname mentioned above and then navigating to the the Vendor Settings > My Site > Advanced Tools > EDIT section of ClickBank.
Scroll down the My Site section in ClickBank to view the Advanced Tools section.

—

—
There is one more piece of information in WishList Member that needs to be entered into ClickBank.
The Thank You URL / Notification URL in the Settings section of the ClickBank integration section in WishList Member.
Copy the Thank You URL / Notification URL from WishList Member…

—
…and paste it into the corresponding field in the Vendor Settings > My Sites > Advanced Tools > EDIT section of ClickBank.

—
The Advanced Tools > Editor opens and you can paste the Thank You URL / Notification URL from WishList Member into the Instant Notification URL field in ClickBank and click the “Save Changes” button.
—
WishList Member and ClickBank are now connected and the integration process can continue.
Integrating ClickBank Products with WishList Member
You can create products in ClickBank and those products can be integrated with corresponding products in WishList Member. This allows you to create a product in ClickBank and anyone who purchases that product will be assigned to the membership level you select in WishList Member.
Create the Product in ClickBank
The first step is creating a product in ClickBank. You also have the option of integrating an existing ClickBank product with WishList Member if you have one.
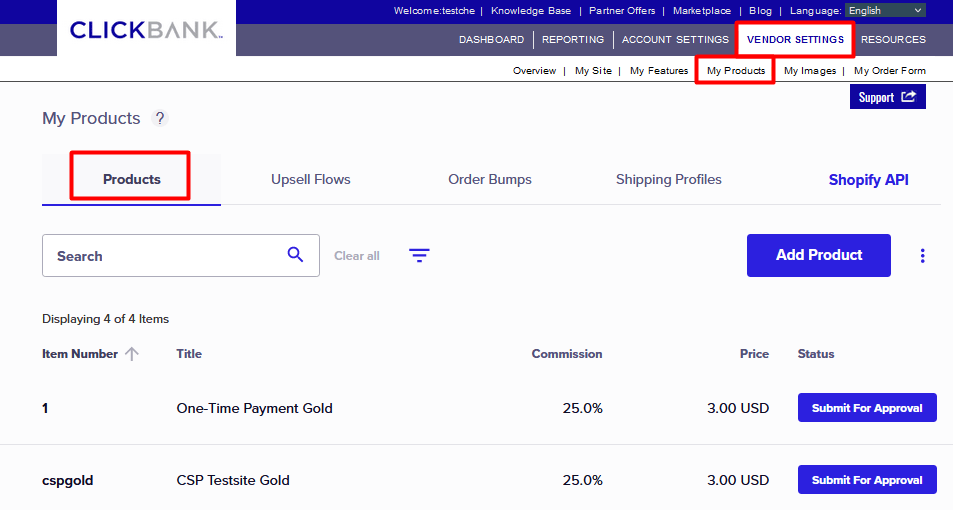
Products can be viewed and created in the Vendor Settings > My Products > Products section of ClickBank.
—
Click the “Add Product” button and the Add a New Product section appears.

—
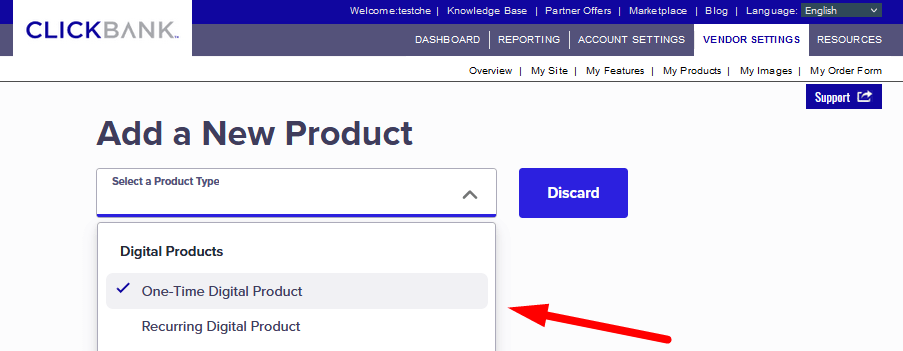
You can use the “Select a Product Type” dropdown to select a One-Time Digital Product if it is a one time payment or a Recurring Digital Product if it is an ongoing payment.
—
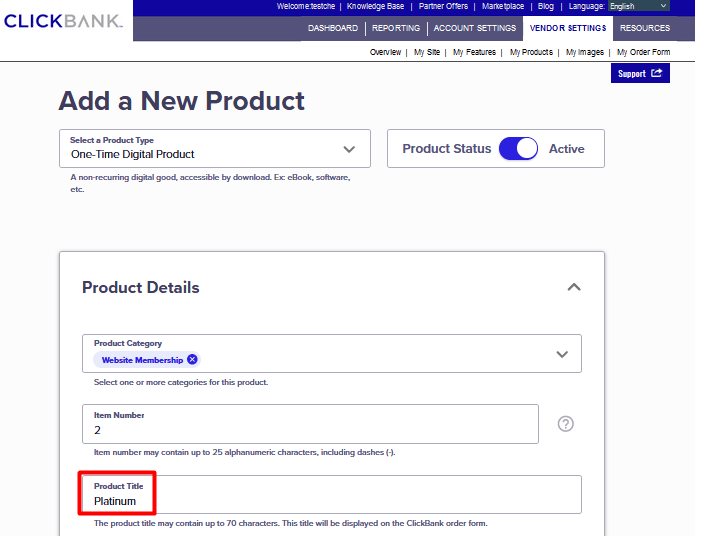
Once you select the product type, the Product Details page will appear and you can create the product according to your preferences including product title, category, item number, etc.
In the example screenshot below, the product is set as a One-Time Digital Product in the Website Membership category and the product title is “Platinum” with an item number of 2.
—
There is one piece of information you need to get from WishList Member and include in your product creation in ClickBank.
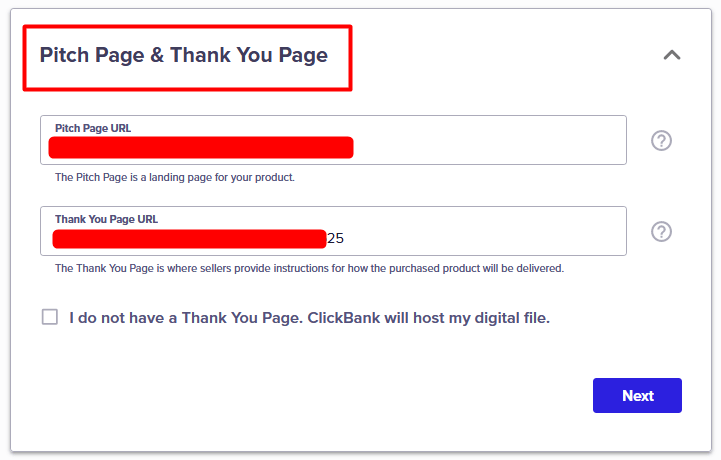
Copy the Thank You / Instant Notification URL from the Setup > Integrations > Payment Providers > ClickBank > Settings section of WishList Member and paste it into the Pitch Page & Thank You page section of the product settings.

—

—
Paste the Thank You / Instant Notification URL into the Thank You Page URL field and click the Next button.
—
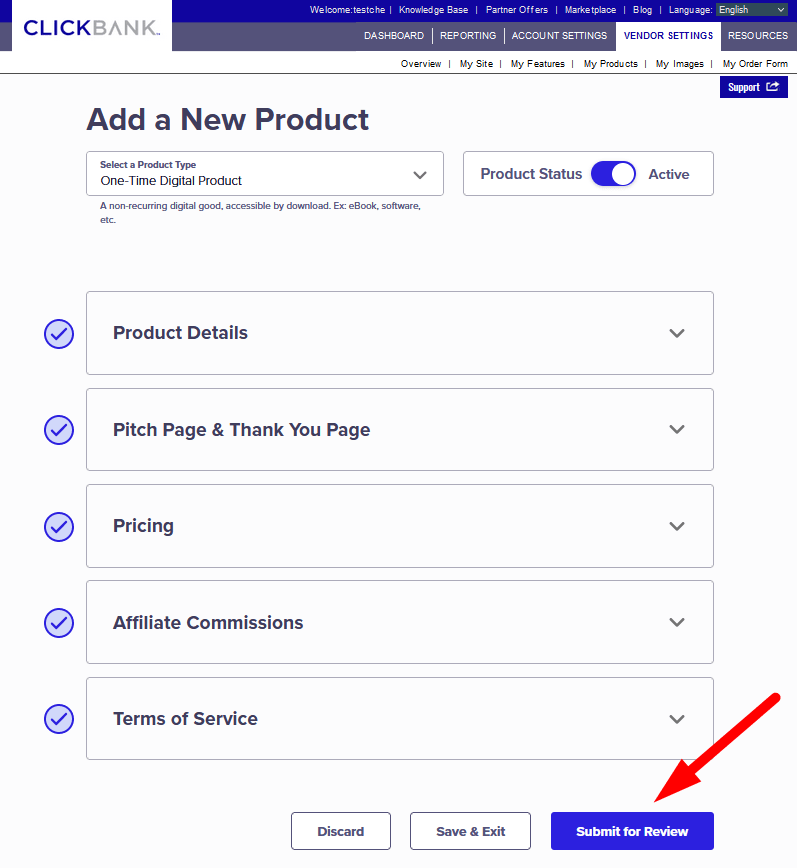
Once you have filled in all the required and desired fields in the Add a New Product section, you can click the Submit for Review button.
—
Create the Corresponding Product in WishList Member
You can now create a corresponding product in WishList Member and connect it with the product in ClickBank.
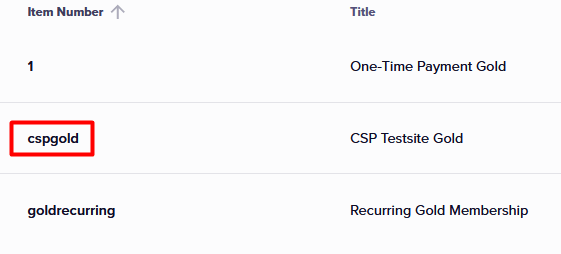
The Item Number of the product in ClickBank will be used to create the connection with the product you create in WishList Member.
You will see the Item Number in the Vendor Settings > My Products > Products section of ClickBank.

—
As an example, the product named “CSP Testsite Gold” has the following set as its Item Number in ClickBank: cspgold
—
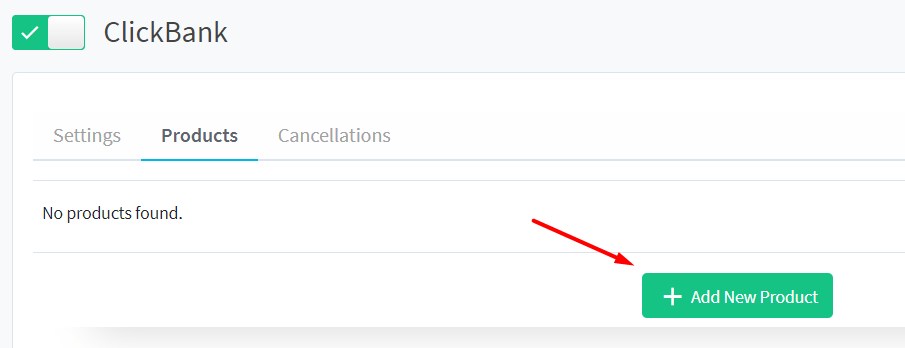
Copy the Item Number and navigate to the Integrations > Payment Providers > ClickBank > Products section in WishList Member. Click the green Add New Product button.
—
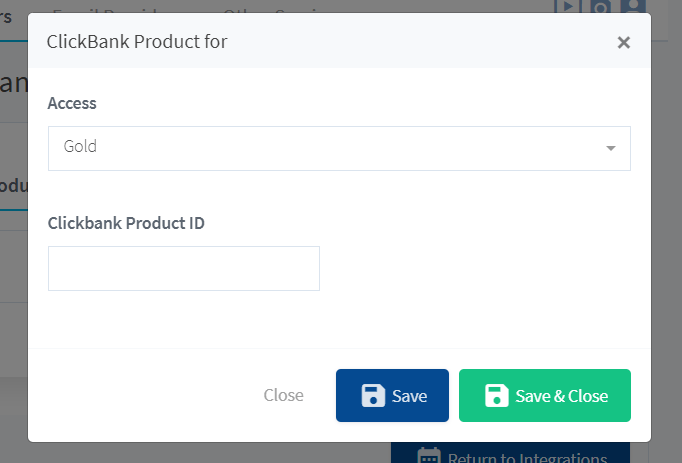
The “ClickBank Product for” pop-up appears. The Access dropdown includes all the membership levels in the WishList Member site. You can use the dropdown to select the membership level a user will be granted access to when they purchase the product.
This can be done by selecting the level and pasting the ClickBank Item Number into the ClickBank Product ID field. Click the Save & Close button to save the settings.
—
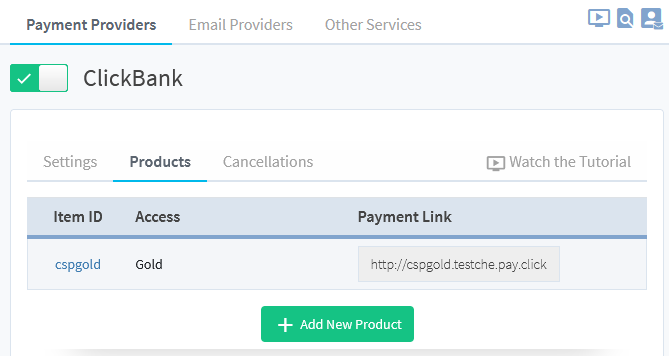
The example screenshot below shows the Gold level selected and the cspgold Item Number set. This means anyone who purchases the CSP Testsite Gold product (ClickBank Item Number: cspgold) will be added to the Gold level in WishList Member.

—
You will see the product appear on the list and you can now sell that product on your site.
—
Selling the Product (with Connected Membership Level)
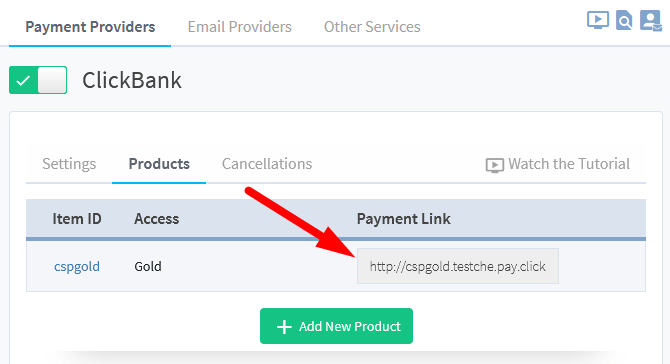
Now that you have created the product in ClickBank and created the corresponding product in WishList Member, you can use the provided Payment Link to sell access to the membership level. The last step is adding the payment link to your site.
—
The Payment Link can be placed anywhere on your site and will direct users to a purchase form when clicked.
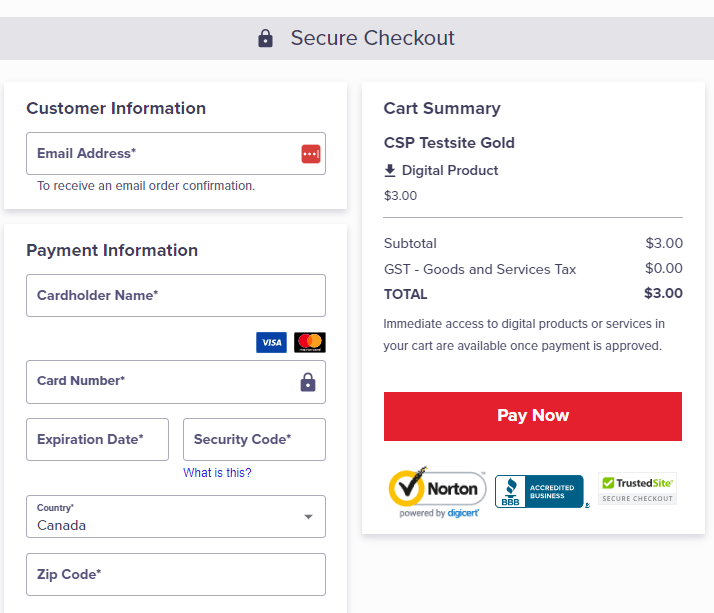
The screenshot below shows an example of the purchase form that will appear when the Payment Link is used.
—
The user can fill in the form and make the payment. This will result in the user being granted access to the corresponding membership level in WishList Member.
—
Subscription Cancellations
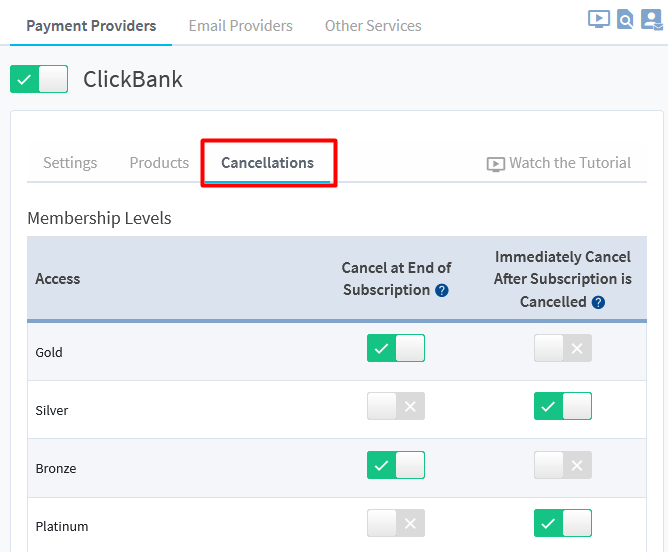
You have two available options related to handling membership cancellations in WishList Member if your product is set as a Recurring Digital Product in ClickBank. These options only apply for products with a recurring digital plan (subscription) and can be configured in the Setup > Integrations > Payment Providers > ClickBank > Cancellations section in WishList Member.
The default option is Cancel at End of Subscription and the membership access in WishList Member would be cancelled immediately upon ClickBank subscription cancellation. If neither option is enabled for a membership level, the membership won't be cancelled in WishList Member when the subscription is cancelled in ClickBank.
These options only apply if the subscription is Cancelled in ClickBank. The options don't apply if the subscription Fails or is Suspended in ClickBank.
—
Cancel at End of Subscription – If enabled, the membership will be cancelled in WishList Member when the subscription ends in ClickBank. As an example, if a subscription has a billing cycle set to charge once a month for a total of 6 months in ClickBank, the membership in WishList Member will be cancelled at the end of the 6 month subscription.
If disabled, the membership will continue to be active in WishList Member when the subscription ends in ClickBank. As an example, if a subscription has a billing cycle set to charge once a month for a total of 6 months in ClickBank, the membership in WishList Member will remain active at the end of the 6 month subscription.
Immediately Cancel After Subscription is Cancelled – If enabled, the membership will be immediately cancelled in WishList Member if the user cancels the subscription in ClickBank. In this example, a subscription has a billing cycle set to charge once a month for a total of 12 months in ClickBank and the monthly re-bill is on the 21st. If the user cancels the subscription in ClickBank on the 4th, their access will be immediately cancelled in WishList Member.
If disabled, the membership in WishList Member will remain active and will wait for the end of the current billing cycle before access is cancelled. This means the member will retain access after they cancel the ClickBank subscription until the end of that billing cycle. In this example, a subscription has a billing cycle set to charge once a month for a total of 12 months in ClickBank and the monthly re-bill is on the 21st. If the user cancels the subscription in ClickBank on the 4th, they will retain access to the membership until it is cancelled on the 21st of the month.
—
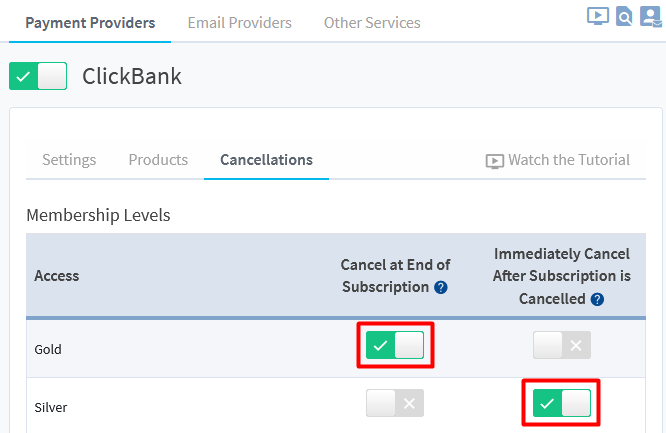
In the example below, users in the Gold membership level would retain access to the Gold membership level until the subscription ends in ClickBank and users in the Silver membership level would lose access to the Silver membership level immediately if they cancel their subscription in ClickBank.
—
You can allow users to pay through ClickBank and gain access to your membership using the methods explained in the article above. This means anyone who purchases a product through ClickBank can be added to a corresponding membership level in WishList Member.
—
