WishList Member includes an integration with with Authorize.net – Simple Checkout.
Enable Authorize.net – Simple Checkout
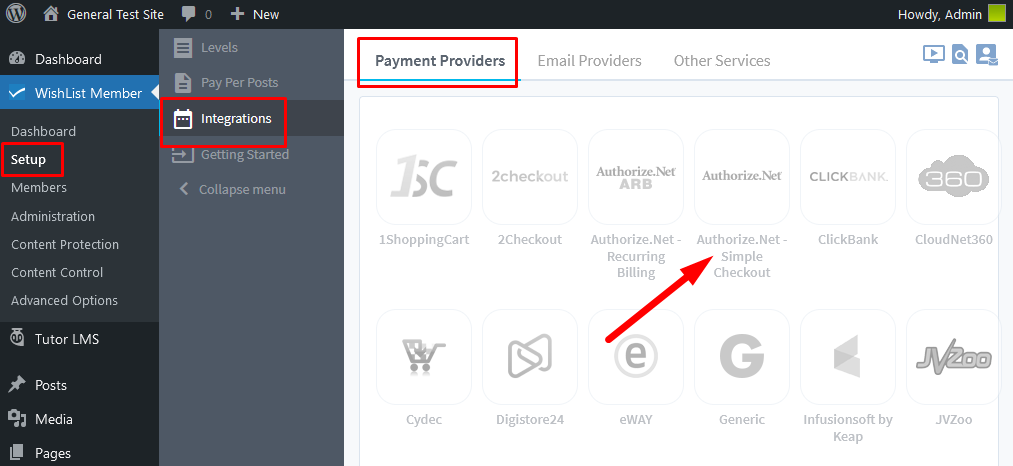
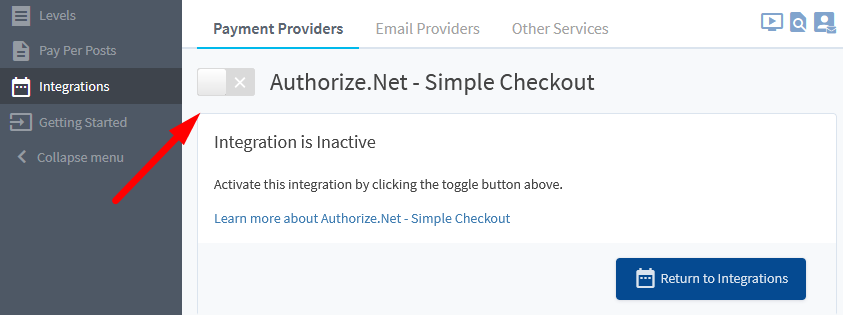
First, you can select and enable the Authorize.net – Simple Checkout option in the Setup > Integrations > Payment Providers section of WishList Member.
—
—
Integration Setup
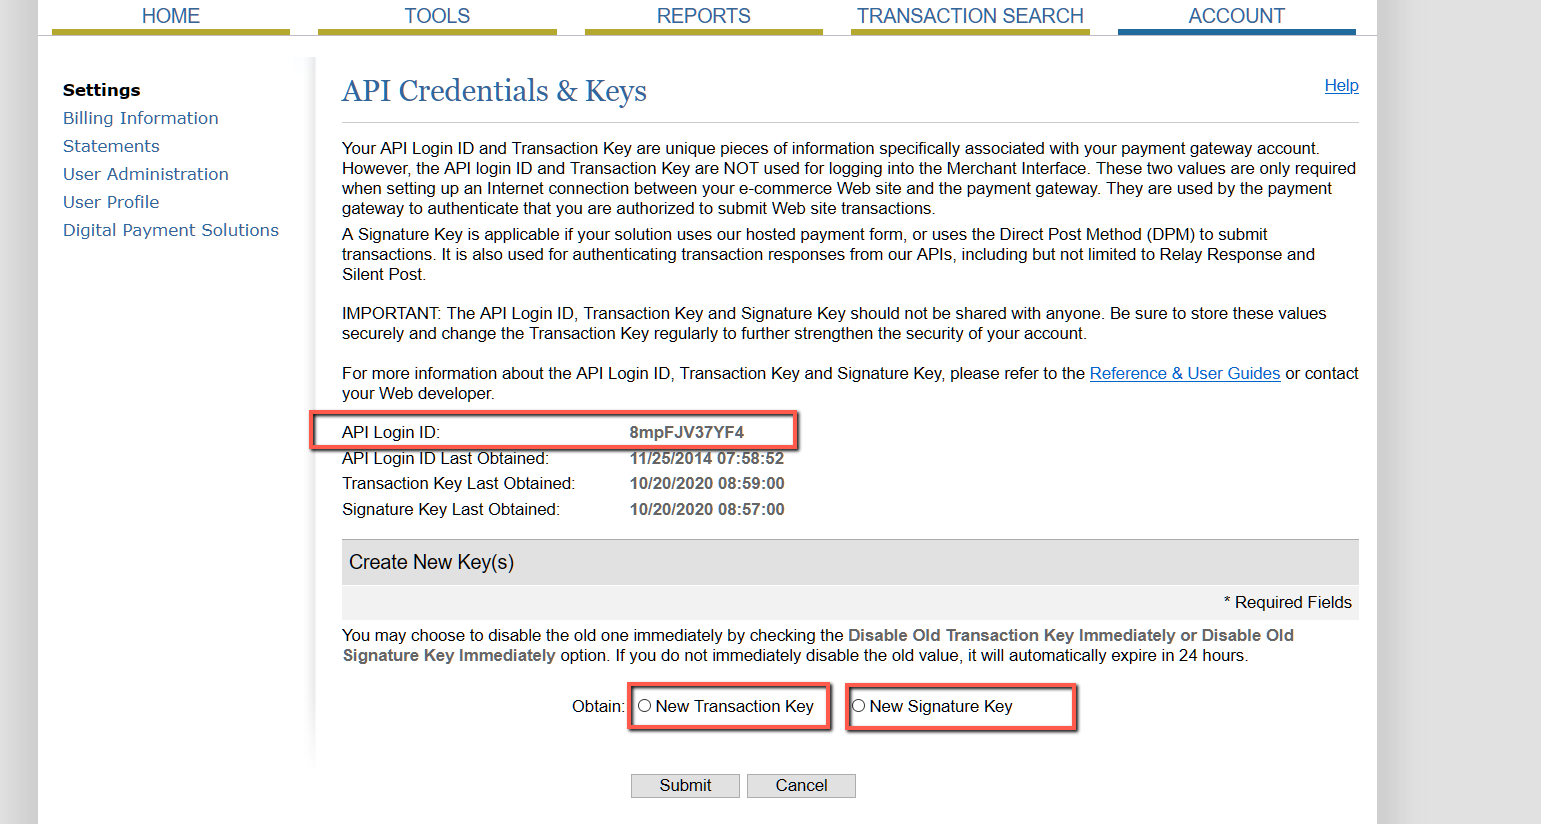
1. Get the API Credentials (API Login ID, Transaction Key, Signature Key) from the Authorize.net account.
This can all be found in the Accounts > API Credentials & Keys section when logged into the account on Authorize.net.
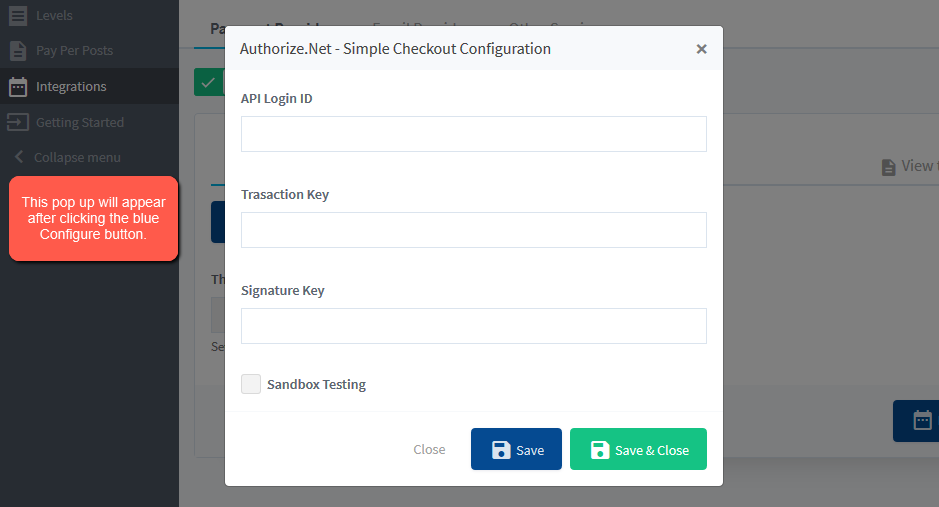
2. Once you have those Credentials, add them to the corresponding fields after clicking the blue Configure button in the Integration section of WishList Member. Once those Credentials are added, click the green Save & Close button.
—
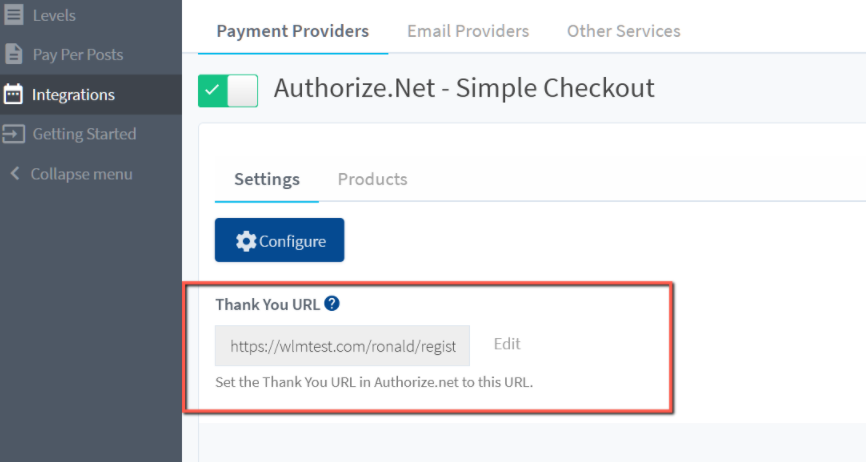
3. Now copy the Thank You URL from WishList Member and set it as the Default Receipt Link URL in Authorize.net.
—
Paste that Thank Your URL from WishList Member into the Default Receipt Link URL field in the Account > Settings > Receipt Page section of Authorize.net
Note: You also need to set the Receipt Method to GET.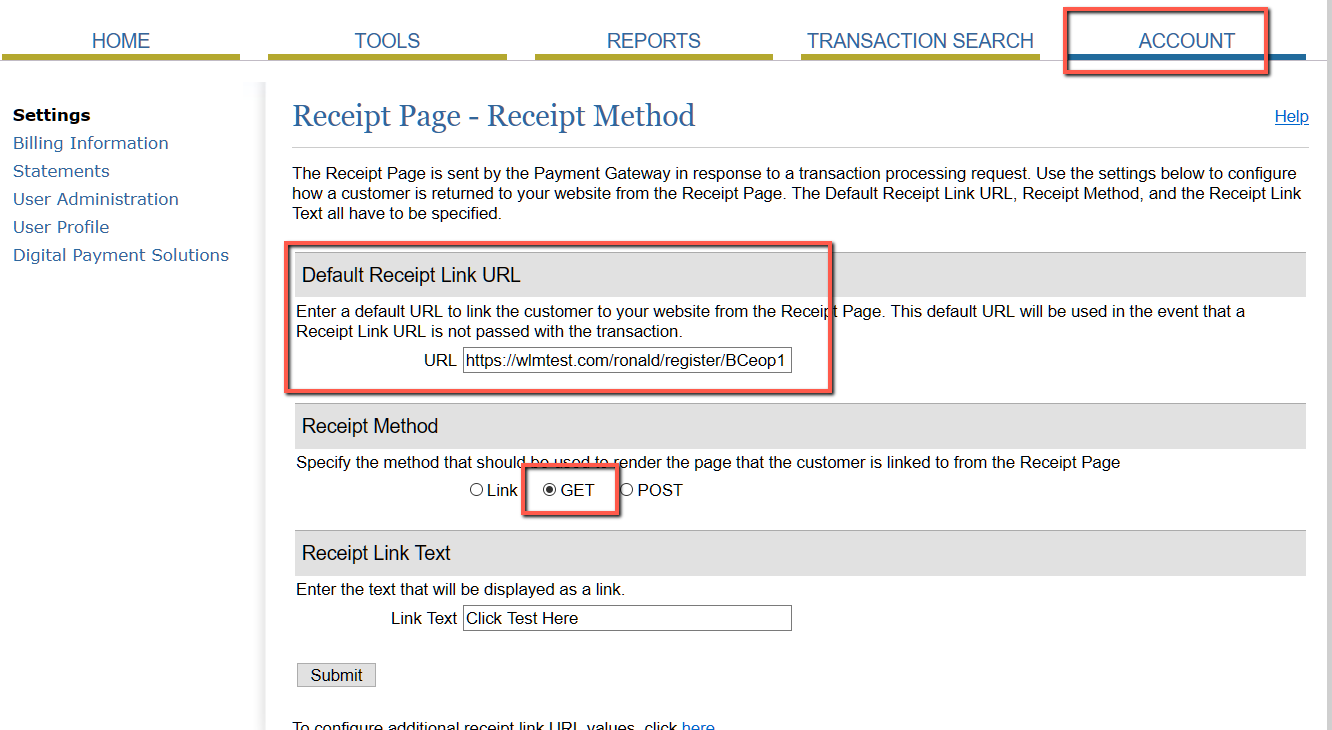
—
Creating a Product
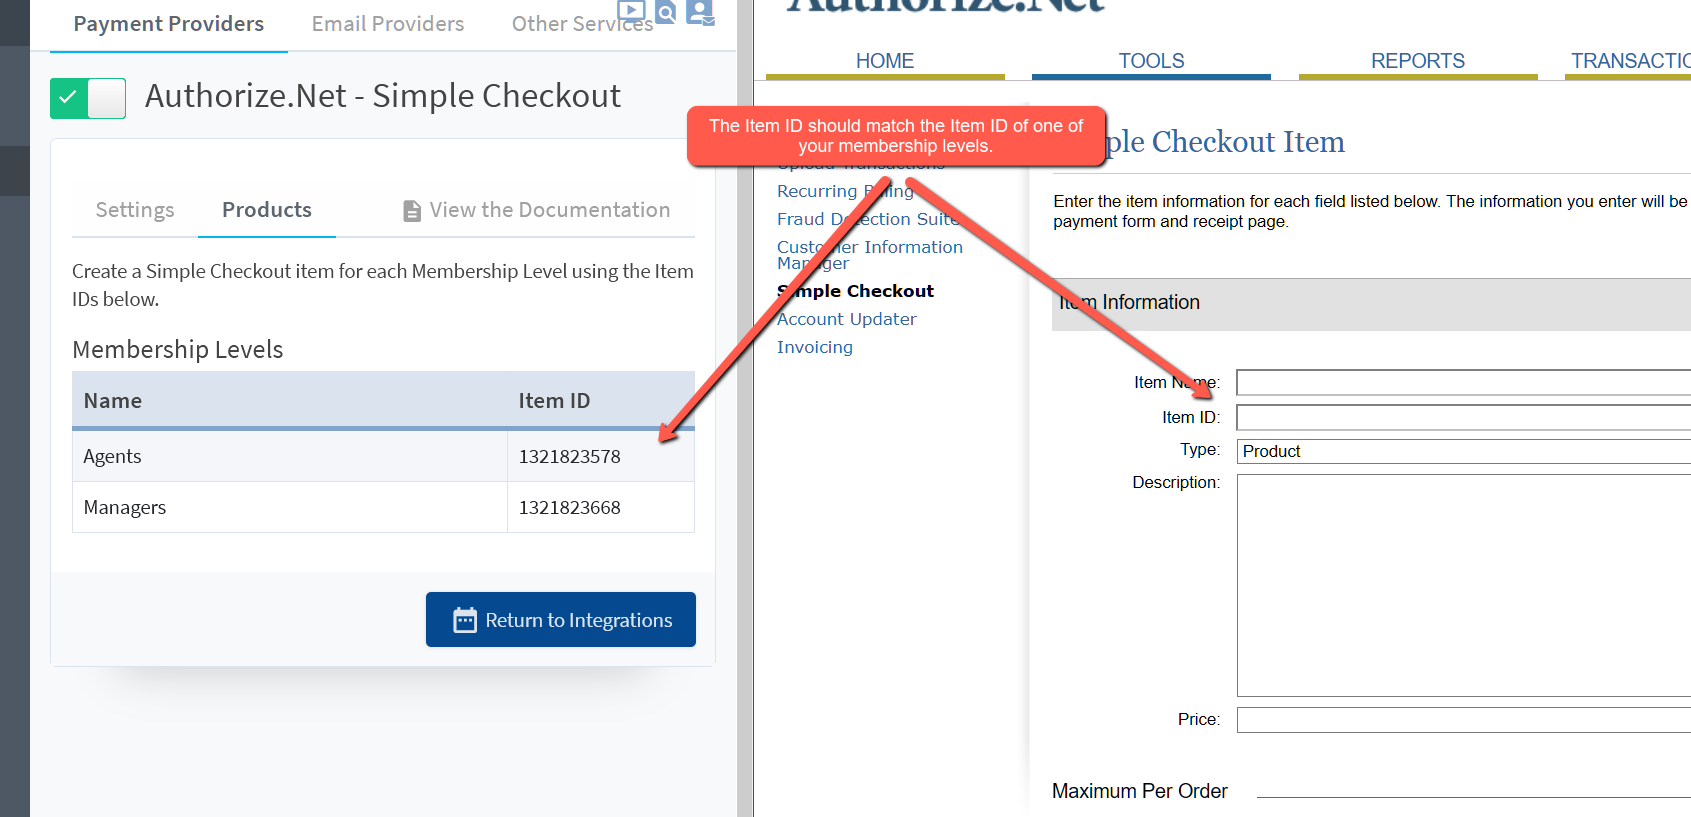
1. Go to Home > Simple Checkout and click the “Add Item” link in Authorize.net
2. Add the Item Name, Description and Price in the corresponding fields but make sure the “Item ID” matches the Item ID of one of your Levels in WishList Member to connect the Product to your Level.
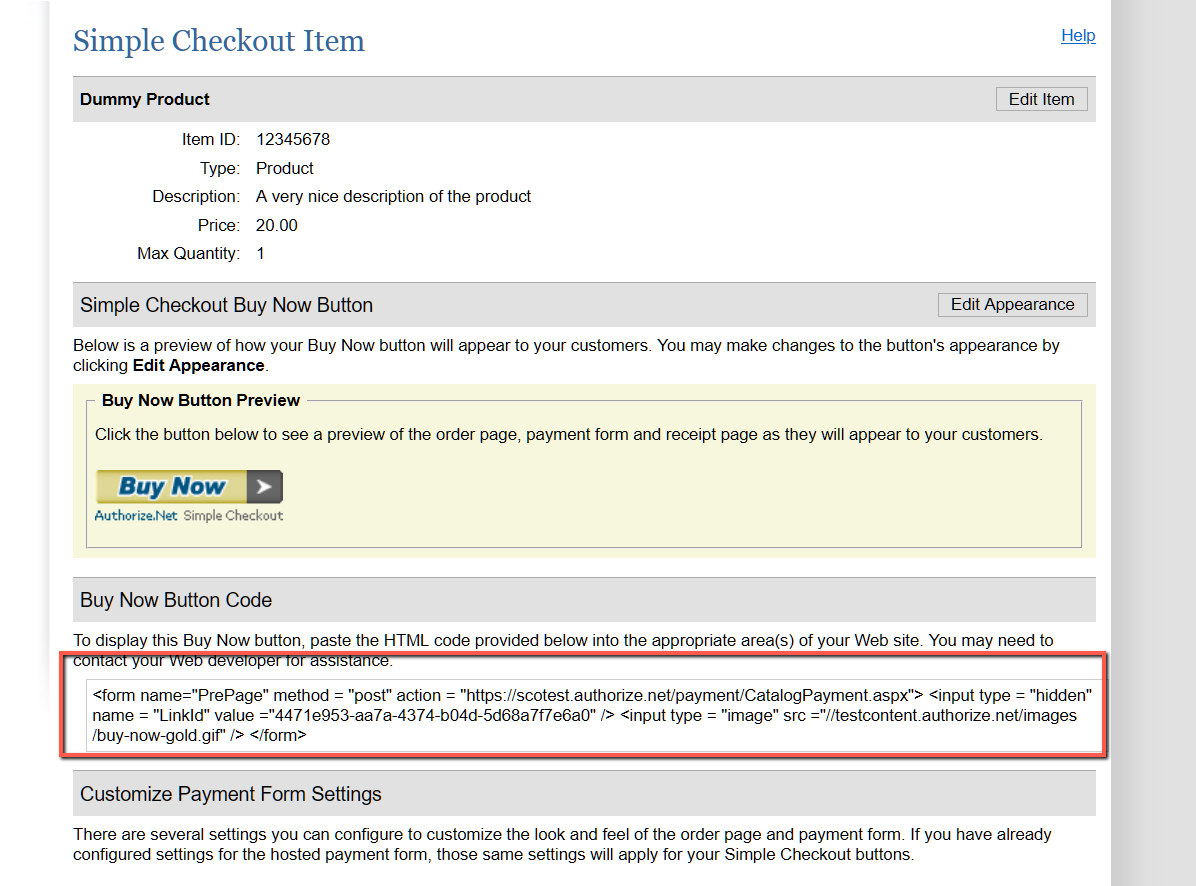
3. Now get the HTML code of the button you created by double clicking the product name in the Simple Checkout page where it lists the products in Authorize.net.
You can use the HTML code to insert the button onto any page(s) or post(s) on your WordPress site.
—
That button can now be clicked on by users who want to purchase/register for access.
