
Any member account can be edited in the Members > Manage section of WishList Member. This allows you to make any adjustments to an individual member's account at any time. You can also edit multiple member accounts at the same time. This is very helpful when you want to move multiple members to a new level or quickly approve access for a group of members. Those are a couple examples of the various options available to you when you bulk edit existing members.
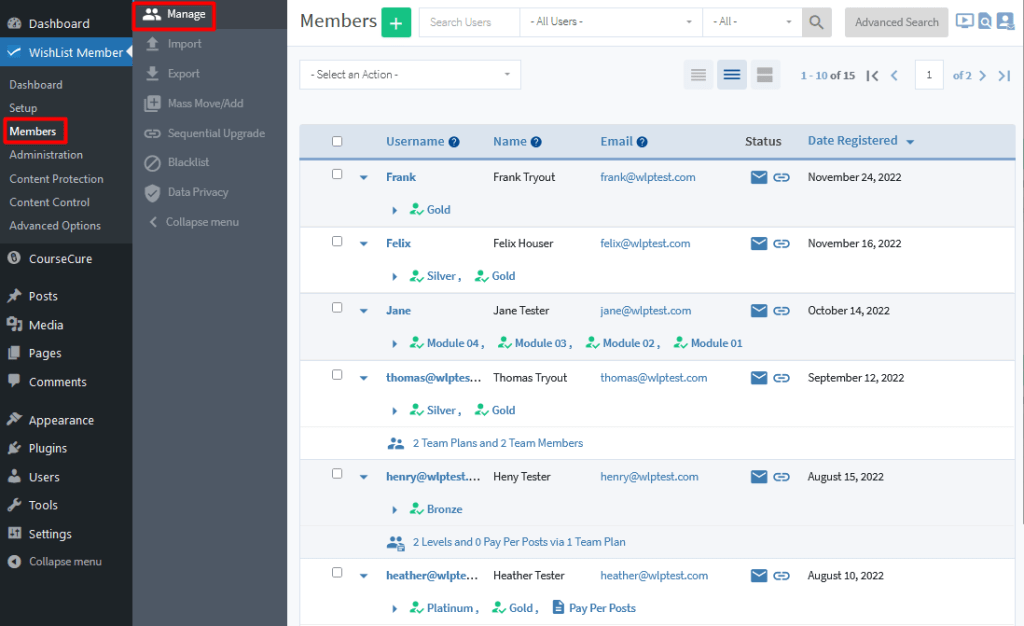
You will see a full list of your members in the Members > Manage section of WishList Member.
—
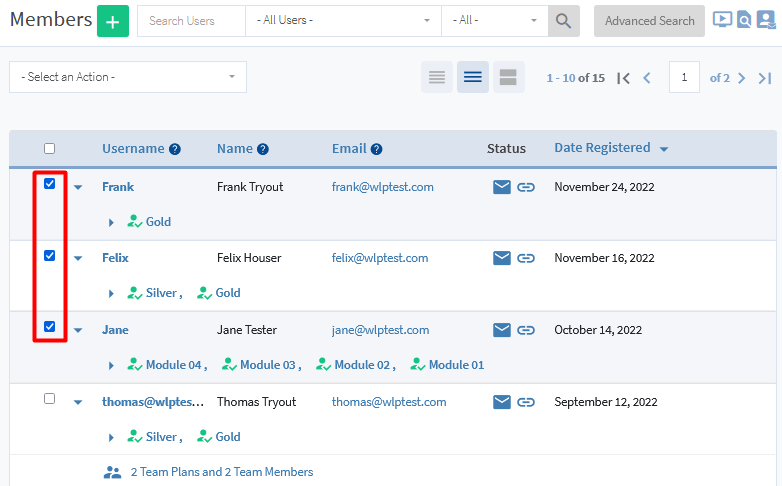
Select the checkbox next to the Usernames of the members you want to bulk edit. You can select as many or as few as you want. Any members selected will have the chosen actions applied to them in the upcoming steps.

—
This screenshot example shows the first three members on the list are selected.
—
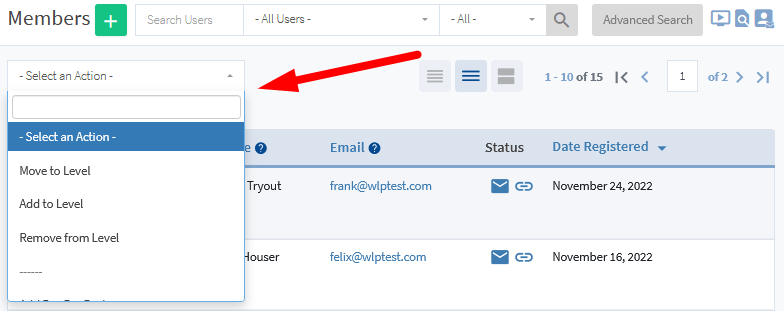
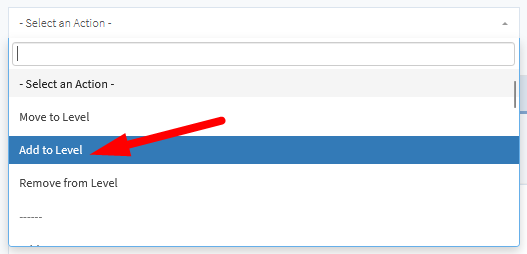
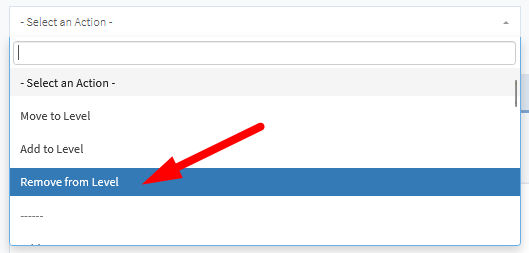
You can now use the “Select an Action” dropdown to apply an action to the selected members. Each action has its own unique functionality and settings that will appear once the action is selected.
—
Select an Action – Actions
We will run through more details below for each action you can apply while bulk editing members.
Move to Level
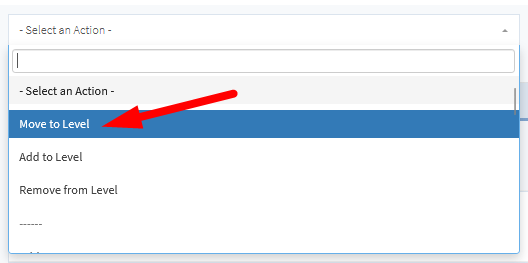
The “Move to Level” action allows you to move a members out of a level and into another level.
—
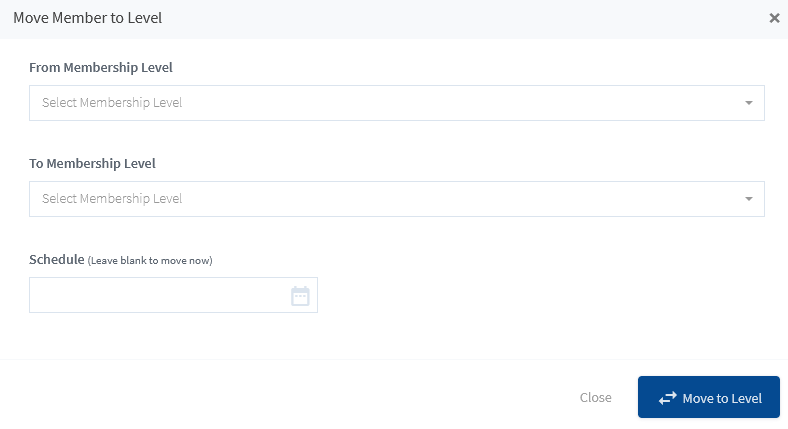
When selected, the Move Member to Level popup appears and displays the available settings.
—
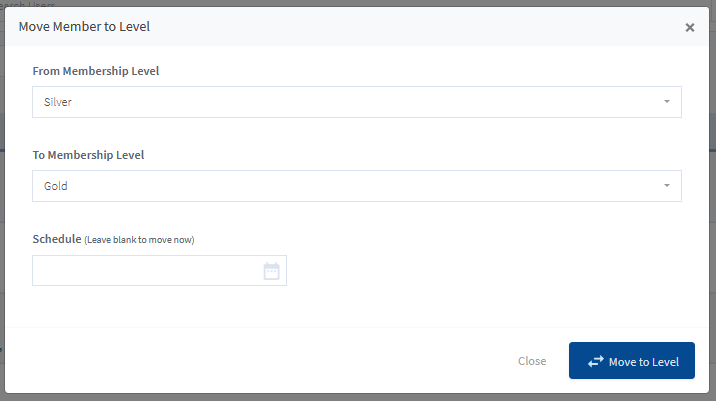
From Membership Level. Select the membership level currently assigned to the members. The members will be moved out of this membership level and into the membership level selected in the “To Membership Level” field.
To Membership Level. Select the membership level the members will be moved into. Once the Move to Level is complete, the members will only be in this membership level.
Schedule. The Move to Level can be scheduled to happen in the future using the date picker in the Schedule field. Leaving this field blank will result in the Move to Level happening instantly.
—
This screenshot example shows the members will be moved out of the Silver level and into the Gold level instantly when the blue Move to Level button is clicked.
—
Add to Level
The “Add to Level” action allows you to add members into another level while they also remain in the previous level.
—
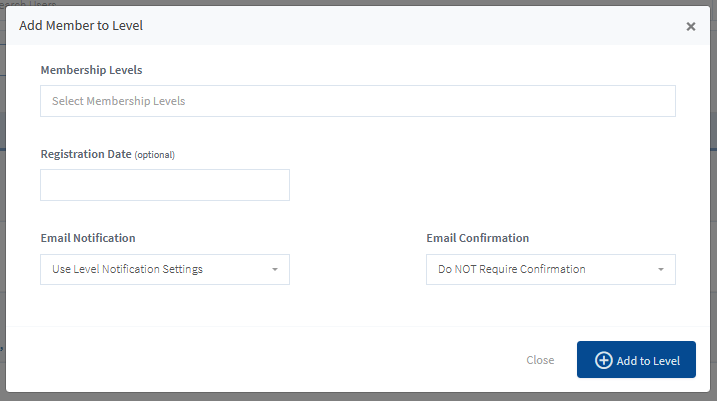
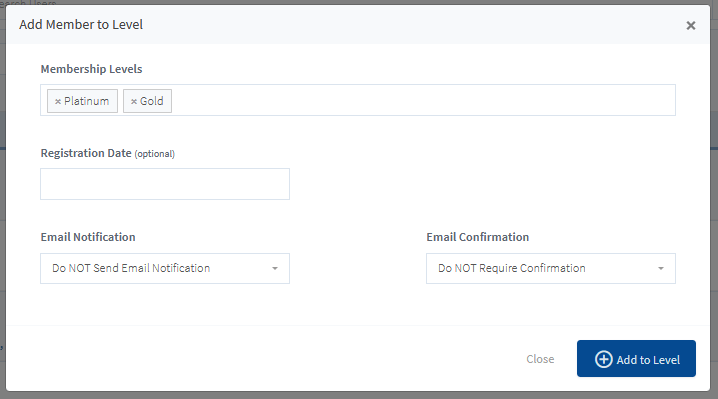
When selected, the Add Member to Level popup appears and displays the available settings.
—
Membership Levels. Select the membership level(s) to be added to the member accounts. The members will retain their previous membership level(s) and will also be added to the selected membership level(s).
Registration Date. You have the option to set the registration date for the membership level(s) by using the date picker in the Registration Date field. Leaving this field blank will result in the date being set to the date the members are added to the level.
Email Notification. An email notification can be sent to the members when they are added to the level(s). You can select from the following options in the dropdown:
- Use Level Notification Settings. The email notification will be sent when the member is added to the level if the selected level is set to send the New Member Registration email.
- Send Email Notification. The email notification will be sent when the member is added to the level regardless of the selected level settings.
- Do NOT Send Email Notification. The email notification will not be sent when the member is added to the level regardless of the selected level settings.
Email Confirmation. An email can be sent that requires the member to confirm before they gain access to the membership level. This email would be sent when the Add to Level button is clicked and the level is added to the member accounts. You can select from the following options in the dropdown:
- Use Level Requirements. The email confirmation will be sent when the member is added to the level if the selected level is set to send the confirmation email.
- Require Confirmation. The email confirmation will be sent when the member is added to the level regardless of the selected level settings.
- Do NOT Require Confirmation. The email confirmation will not be sent when the member is added to the level regardless of the selected level settings.
—
This screenshot example shows the members will be added to the Gold level and the Platinum level instantly when the blue Add to Level button is clicked. The Email Notification is set to not be sent and the Email Confirmation is set to not be required.
—
Remove From Level
The “Remove from Level” action allows you to remove members from other level(s).
—
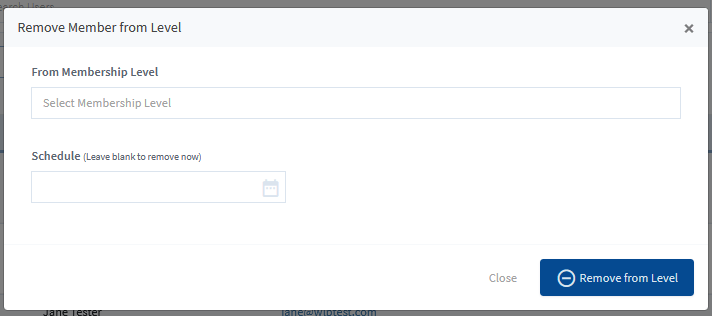
When selected, the Remove Member from Level popup appears and displays the available settings.
—
From Membership Level. Select the membership level(s) to be removed from the member accounts. The members will be removed from the selected membership level(s).
Schedule. The Remove from Level can be scheduled to happen in the future using the date picker in the Schedule field. Leaving this field blank will result in the Remove from Level happening instantly.
—
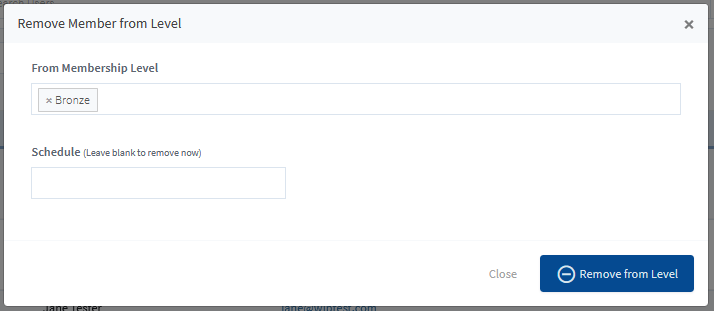
This screenshot example shows the members will be removed from the Bronze level instantly when the blue Remove from Level button is clicked.
—
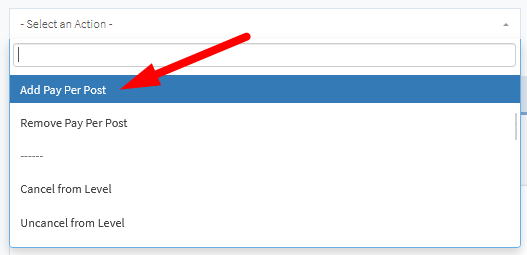
Add Pay Per Post
The “Add Pay Per Post” action allows you to add a Pay Per Post to member accounts.
—
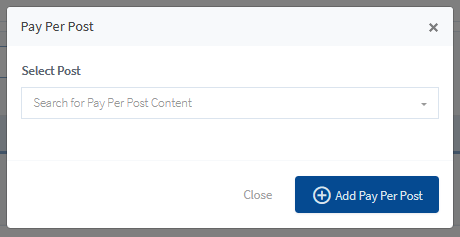
When selected, the Pay Per Post popup appears and displays the available settings.
—
Select Post. Select the pay per post(s) to be added to the member accounts.
—
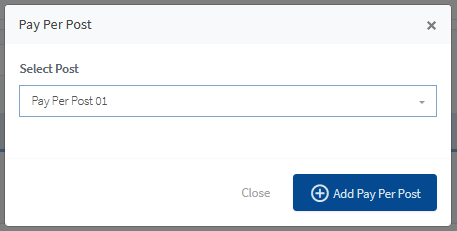
This screenshot example shows the members will be added to the Pay Per Post named “Pay Per Post 01” when the blue Add Pay Per Post button is clicked.
—
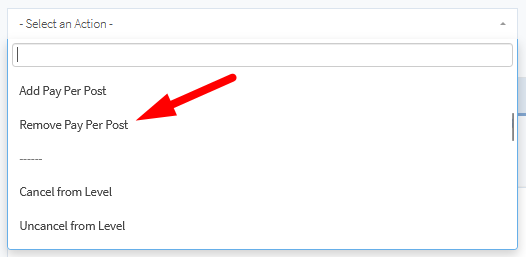
Remove Pay Per Post
The “Remove Pay Per Post” action allows you to remove a Pay Per Post from member accounts.
—
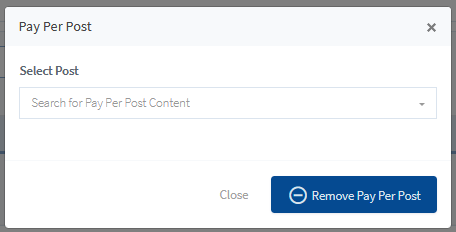
When selected, the Pay Per Post popup appears and displays the available settings.
—
Select Post. Select the pay per post(s) to be removed from the member accounts.
—
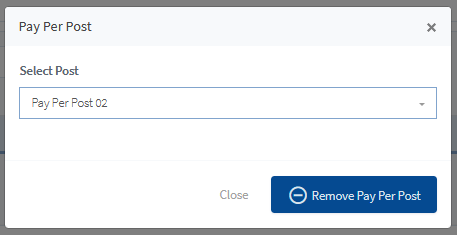
This screenshot example shows the members will be removed from the Pay Per Post named “Pay Per Post 02” when the blue Remove Pay Per Post button is clicked.
—
Cancel From Level
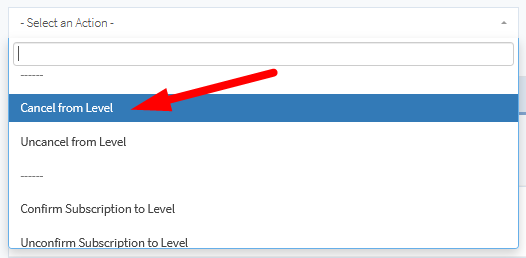
The “Cancel from Level” action allows you to cancel members from the selected membership level(s). Members cannot access content assigned to a membership level if they have been cancelled from that level.
—
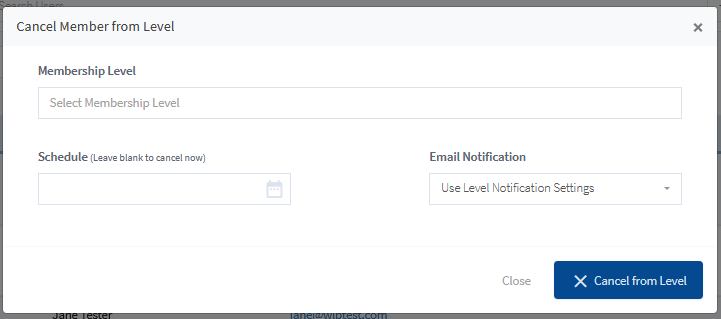
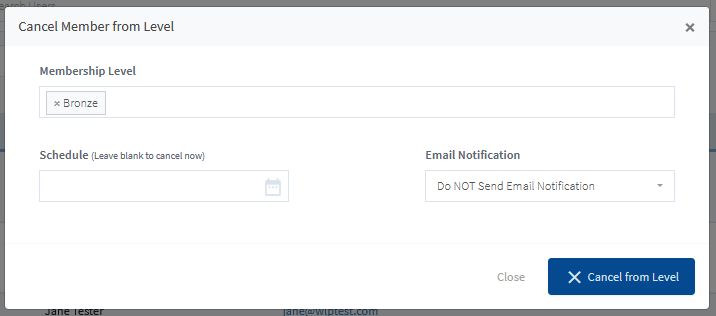
When selected, the Cancel Member from Level popup appears and displays the available settings.
—
Membership Level. Select the membership level(s) to be cancelled from the member accounts.
Schedule. The Cancel from Level can be scheduled to happen in the future using the date picker in the Schedule field. Leaving this field blank will result in the Cancel from Level happening instantly.
Email Notification. An email notification can be sent to the members when they are cancelled from the level(s). You can select from the following options in the dropdown:
- Use Level Notification Settings. The email notification will be sent when the member is cancelled from the level if the selected level is set to send the Membership Cancelled email.
- Send Email Notification. The email notification will be sent when the member is cancelled from the level regardless of the selected level settings.
- Do NOT Send Email Notification. The email notification will not be sent when the member is cancelled from the level regardless of the selected level settings.
—
This screenshot example shows the members will be uncancelled from the Bronze level instantly when the blue Cancel from Level button is clicked. The Email Notification is set to not be sent.
—
Uncancel From Level
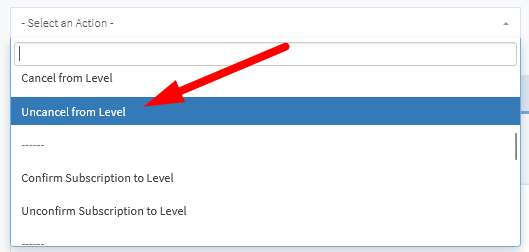
The “Uncancel from Level” action allows you to uncancel members from the selected membership level(s). This action can be used for members who have a membership level assigned to them with a cancelled status. Members who were previously cancelled from a membership level will be able to access content assigned to the membership level again if they have been uncancelled from that membership level.
—
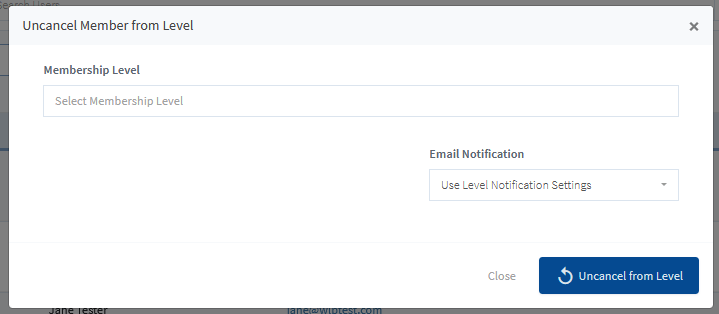
When selected, the Uncancel Member from Level popup appears and displays the available settings.
—
Membership Level. Select the membership level(s) to be uncancelled from the member accounts.
Email Notification. An email notification can be sent to the members when they are uncancelled from the level(s). You can select from the following options in the dropdown:
- Use Level Notification Settings. The email notification will be sent when the member is uncancelled from the level if the selected level is set to send the Membership Uncancelled email.
- Send Email Notification. The email notification will be sent when the member is uncancelled from the level regardless of the selected level settings.
- Do NOT Send Email Notification. The email notification will not be sent when the member is uncancelled from the level regardless of the selected level settings.
—
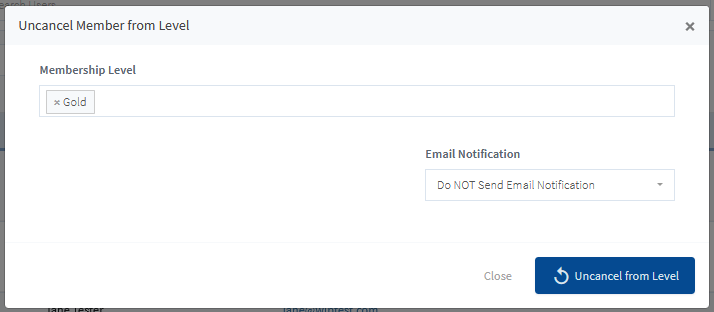
This screenshot example shows the members will be uncancelled from the Gold level instantly when the blue Uncancel from Level button is clicked. The Email Notification is set to not be sent.
—
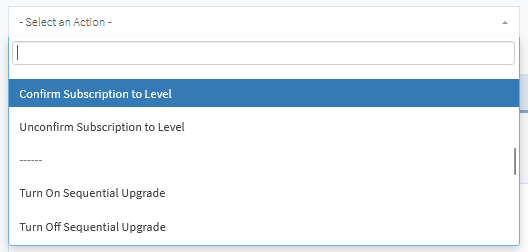
Confirm Subscription to Level
The “Confirm Subscription to Level” action allows you to confirm level access for members to a selected membership level that requires confirmation. Members cannot access content assigned to the level until they have been confirmed. If a level has the “Require Users to Confirm Email” option enabled and a member has registered to this level and has not yet confirmed, you can manually confirm their subscription with this action.
This action can be used for members who have a membership level assigned to them with an unconfirmed status. Members who previously had an unconfirmed status for a membership level will be able to access content assigned to the membership level once they are confirmed for that membership level.
—
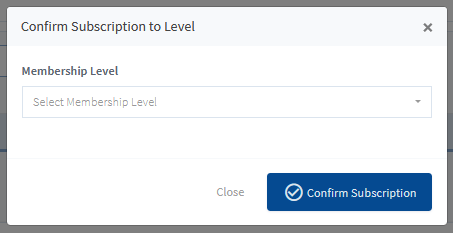
When selected, the Confirm Subscription to Level popup appears and displays the available settings.
—
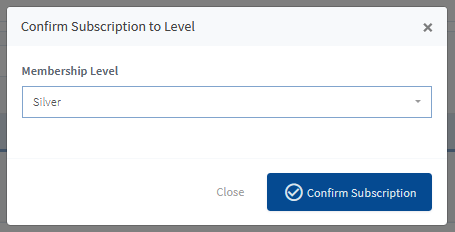
Membership Level. Select the membership level to be confirmed for the member accounts.
—
This screenshot example shows the members will be confirmed for the Silver level when the blue Confirm Subscription button is clicked.
—
Unconfirm Subscription to Level
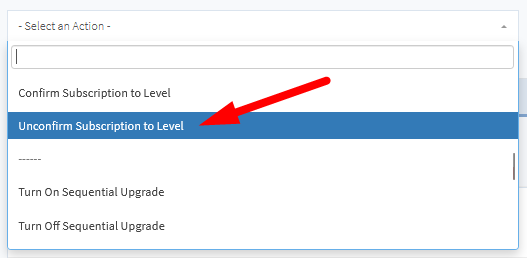
The “Unconfirm Subscription to Level” action allows you to unconfirm level access for members to a selected membership level that requires confirmation. If a member has confirmed through email, you can manually unconfirm them and require they re-confirm through email again.
—
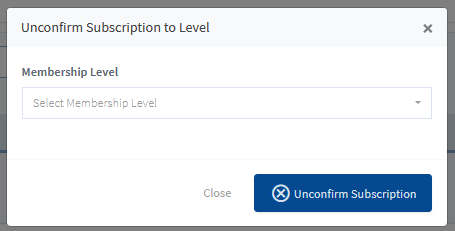
When selected, the Unconfirm Subscription to Level popup appears and displays the available settings.
—
Membership Level. Select the membership level to be unconfirmed for the member accounts.
—
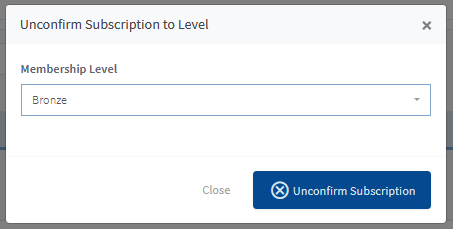
This screenshot example shows the members will be unconfirmed for the Bronze level when the blue Unconfirm Subscription button is clicked.
—
Approve Registration to Level
The “Approve Registration to Level” action allows you to confirm level access for members to a selected membership level that requires admin approval. Members cannot access content assigned to the level until they have been approved. If a level has the “Require Admin Approval” option enabled and a member has registered to this level and has not yet been approved by the site admin, you can approve their registration to the level with this action.
This action can be used for members who have a membership level assigned to them with an unapproved status. Members who previously had an unapproved status for a membership level will be able to access content assigned to the membership level once they are approved for that membership level.
Bulk Edit Existing Members in WishList Member – Unconfirm Subscription to Level
—
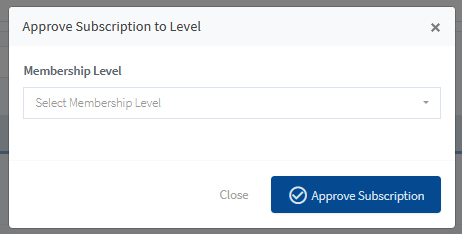
When selected, the Approve Subscription to Level popup appears and displays the available settings.
—
Membership Level. Select the membership level to be approved for the member accounts.
—
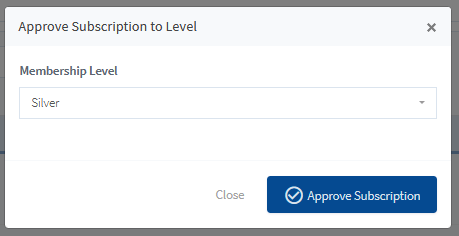
This screenshot example shows the members will be approved for the Silver level when the blue Approve Subscription button is clicked.
—
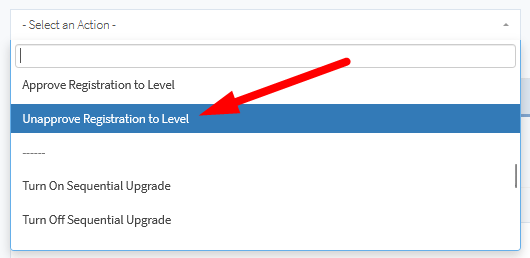
Unapprove Registration to Level
The “Unapprove Subscription to Level” action allows you to unapprove level access for members to a selected membership level that requires approval. If access has been approved, you can manually unconfirm the access to the level.
—
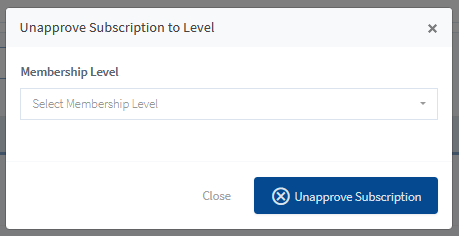
When selected, the Unapprove Subscription to Level popup appears and displays the available settings.
—
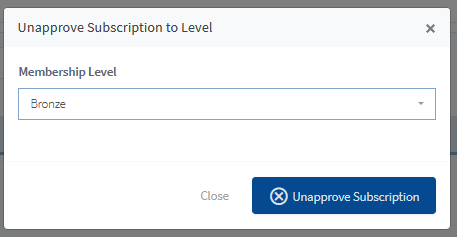
Membership Level. Select the membership level to be unapprove for the member accounts.
—
This screenshot example shows the members will be unapproved for the Bronze level when the blue Unapprove Subscription button is clicked.
—
Turn On Sequential Integration
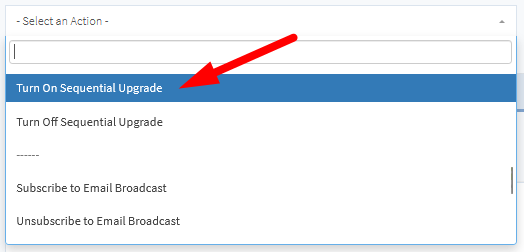
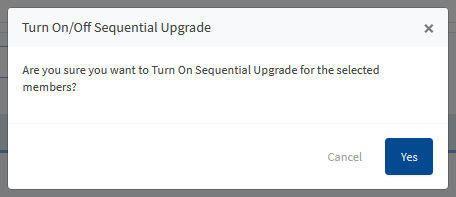
The “Turn On Sequential Upgrade” action allows you to enable the sequential upgrade feature for members. This will allow members to progress through any applicable sequential upgrades (if you have created a sequential upgrade).
—
When selected, the Turn On/Off Sequential Upgrade popup appears and displays a message asking for confirmation to enable sequential upgrade for the members. The sequential upgrade will be enabled for the members when the blue Yes button is clicked.
—
Turn Off Sequential Integration
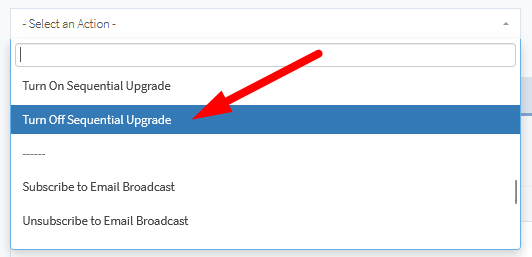
The “Turn Off Sequential Upgrade” action allows you to disable the sequential upgrade feature for members. This will prevent members from progressing through any applicable sequential upgrades (if you have created a sequential upgrade).
—
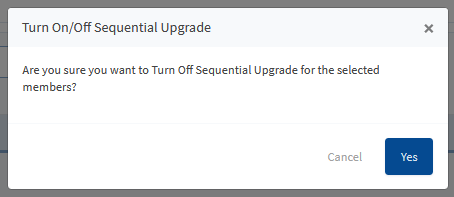
When selected, the Turn On/Off Sequential Upgrade popup appears and displays a message asking for confirmation to disable sequential upgrade for the members. The sequential upgrade will be disabled for the members when the blue Yes button is clicked.
—
Subscribe to Email Broadcast
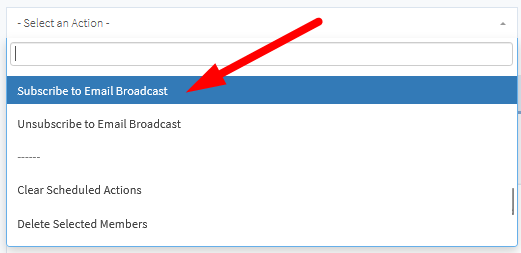
The “Subscribe to Email Broadcast” action allows you to subscribe members to the Email Broadcast. This will allow members to be sent emails you send through the email broadcast feature (if you send any email broadcasts).
—
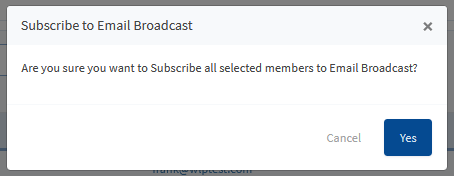
When selected, the Subscribe to Email Broadcast popup appears and displays a message asking for confirmation to subscribe members to the Email Broadcast. The email broadcast will be enabled for the members when the blue Yes button is clicked.
—
Unsubscribe to Email Broadcast
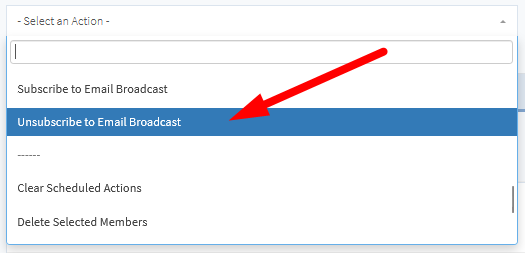
The “Unsubscribe to Email Broadcast” action allows you to unsubscribe members from the Email Broadcast. This will prevent members from being sent emails you send through the email broadcast feature (if you send any email broadcasts).
—
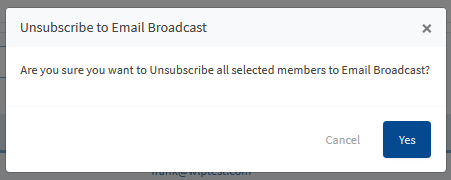
When selected, the Unsubscribe to Email Broadcast popup appears and displays a message asking for confirmation to unsubscribe members from the Email Broadcast. The email broadcast will be disabled for the members when the blue Yes button is clicked.
—
Clear Scheduled Actions
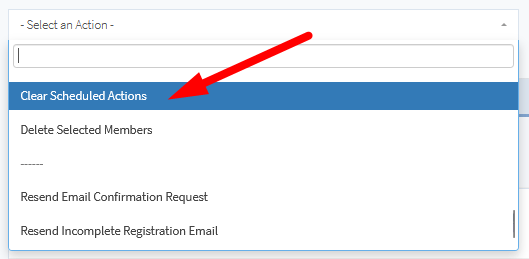
The “Clear Scheduled Actions” action allows you to clear any actions you have scheduled for members. This will remove any actions you may have scheduled to happen in the future (if you have scheduled action to happen in the future). This includes actions like Move to Level, Add to Level, Remove from Level, etc.
—
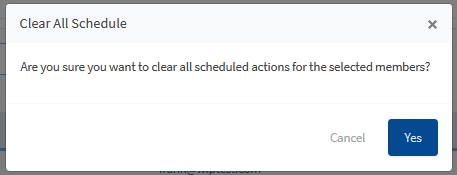
When selected, the Clear All Schedule popup appears and displays a message asking for confirmation to clear all the scheduled actions. All scheduled actions will be removed for the members when the blue Yes button is clicked.
—
Delete Selected Members
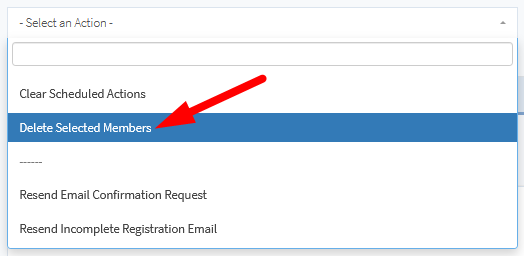
The “Delete Selected Members” action allows you to delete the selected members. Please note, this will delete any of the members you have selected and once a member is deleted, they cannot be recovered.
—
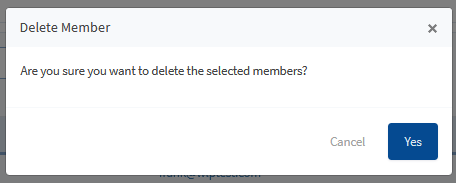
When selected, the Delete Member popup appears and displays a message asking for confirmation to delete the members. All selected members will be deleted when the blue Yes button is clicked.
—
Resend Email Confirmation Request
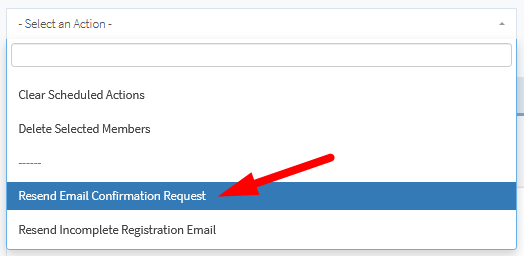
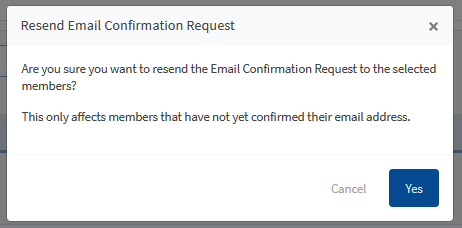
The “Resend Email Confirmation Request” action allows you to resend the email confirmation that is sent when a member registers for a level that Require Users to Confirm Email. This only applies to levels that require confirmation through email and the members who have not yet confirmed through email for that level.
—
When selected, the Resend Email Confirmation Request popup appears and displays a message asking for confirmation to resend the email confirmation request. All selected members who have not yet confirmed through email for that level will be sent the confirmation email request when the blue Yes button is clicked.
—
Resend Incomplete Registration Email
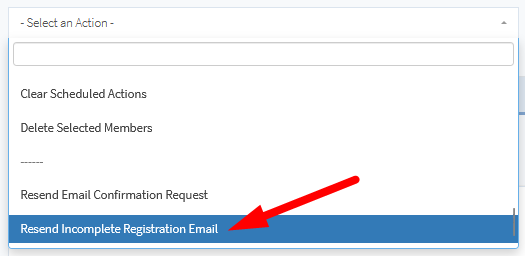
The “Resend Incomplete Registration Email” action allows you to resend the email that is sent when a user doesn't complete their registration. This only applies to users who do not complete the registration process and appear as “Incomplete Registrations” in the Members > Manage section of WishList Member. The user can use the link sent in the Incomplete Registration email to complete their registration.
—
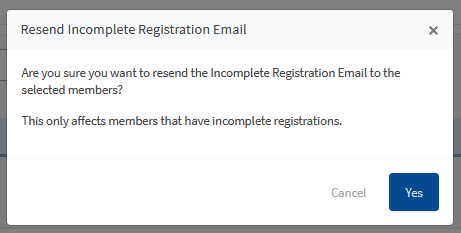
When selected, the Resend Incomplete Registration Email popup appears and displays a message asking for confirmation to resend the incomplete registration email. All selected members who have not completed their registration will be sent the incomplete registration email when the blue Yes button is clicked.
—
The information provided above can be used to bulk edit any existing members in your site. This means you can apply changes to multiple members all at once with a few clicks using the available tools in the Members > Manage section of WishList Member.
